
When we moved to Pacific Grove, we knew that this was it. We fell in love with the small town vibes, the close-knitted community, the 5-minute drive to the beach, the 20 minute drive to the Big Sur coast. So when we looked for a house, we looked for one with good bones. We ended up finding one that we loved, but we knew that a remodel was in our future because we had so many dreams of what it could be: a dream home that would be the place for many gatherings, dinners, stories, and friends. After many months of researching, planning, designing, and DIY-ing our house remodel, we finally made it. Here's our journey!

THE START OF IT ALL
STYLE: Our inspiration behind our house remodel was Japandi style, a mix of Japanese and Scandinavian style. It uses minimalism, natural light, neutral colors, and natural materials. Before settling on this style, our house had previously been more boho, with lots of rattan, wicker, pampas grass, macrame. We kept some of these pieces, but updated much of the new house with natural materials like wood and linen textures.
TIMELINE: We started working with an architect to draw up plans in November 2021, submitted application for permits in March 2023, and started construction in July 2023. We ordered a lot of our materials ahead of time to avoid delays, but that did mean that our garage was entirely too full. Our construction crew luckily lent us their trailer, which we used for most of the project. PLANS: With a 3 bedroom, 1 bathroom house, our main goals were to 1) Add a bathroom 2) Add a dining room 3) Remodel the kitchen 4) Remodel the existing bathroom. We had heard that it was best to live in a house before remodeling it, and though we had hoped to start construction much earlier, we were glad to have had time in the house to learn what we wanted. In total, we added 500 square feet to the existing footprint. To lower costs, we tried to change the existing rooms as little as possible when designing our floor plan. While this did stay true in some ways, we did end up doing new floors and paint throughout the house, and many small changes ended up cascading into other changes. COSTS: When people say double or triple your budget for a house remodel, that couldn't be more true. To lower costs, we did DIY parts of the remodel ourselves and purchased almost every material ourselves. We bought almost every material during a sale or using a coupon. Home Depot kept sending us 10% off entire purchase coupons, so we would wait until we had a large order to purchase. We got both Home Depot and Lowe's credit cards for 365 day returns. During the last few months of construction, we were working around the clock doing house projects. It was 110% worth it for what we wanted - which was a remodel to last a lifetime, and that meant choosing quality materials and work, as well as well-thought out designs and purchases - but it only was worth it because we were building our dream home to live in for a very, very long time. THE DETAILS
WALL PAINT: Color Atelier 200% Wabi + 100% Bone (Primer for all walls, Sealer for Kitchen/Bathroom)
When we had the house first painted a few years back, one of our biggest regrets was not doing limewash paint. Though we had definitely thought about it, it sounded expensive so we ended up going with regular latex paint and never even got a quote for what limewash would cost. When we decided to do it right this time - the way we really wanted - we knew that painting was one of the few DIY projects where we could really save money. Luckily we also had an awesome painter, who we re-hired to do some of the more difficult parts of the job like clear coating the windows and doors as well as the tongue-and-groove ceiling. She helped us with getting the right materials and gave us lots of pro tips. Limewash is a very DIY-friendly paint as well, so it helped that we wanted a more organic look! When choosing the paint itself, we went with Color Atelier because they were stocked at our local paint shop. Other brands we had looked into were Portola Paints and Bauwerk Colour. It definitely helped being able to buy from a local shop though, because we were able to buy more as needed. When choosing a color, we looked at countless photos on Color Atelier's Instagram page. We always liked the color Wabi, and originally were going to do 150% Wabi. But we read that a mix of two colors was recommended to get more texture, especially with lighter colors. We found this to be true, and got paint samples of 150% Wabi and 100% Bone. We did struggle a lot with the final paint decision, and were worried that the color would be too light and feel white. We ended up going with 200% Wabi to get a darker shade and higher contrast. FLOORING: Opus Pescara Engineered Hardwood The most popular types of flooring are hardwood, engineered hardwood, and LVP. Because we had radiant heating and a concrete subfloor, hardwood was out. We went to multiple flooring stores and brought along our cabinet front sample. We had also done a ton of research online, and ordered some samples online as well. Though we thought it'd be easy to find one we liked, we ended up only liking one. We felt like the LVP looked too fake, and our goal was to get one that was pretty close match to our white oak cabinets and had a thick veneer for durability. Opus Pescara was the only one that had the same color, not too much variation, and subtle grain. DOORS AND WINDOWS: Sierra Pacific Windows One of the non-negotiables was wood windows and doors. We shopped around and went with Sierra Pacific Windows because they were in our budget. Instead of doing the basic fir, we upgraded to alder - definitely the right decision! THE ROOMSKITCHEN
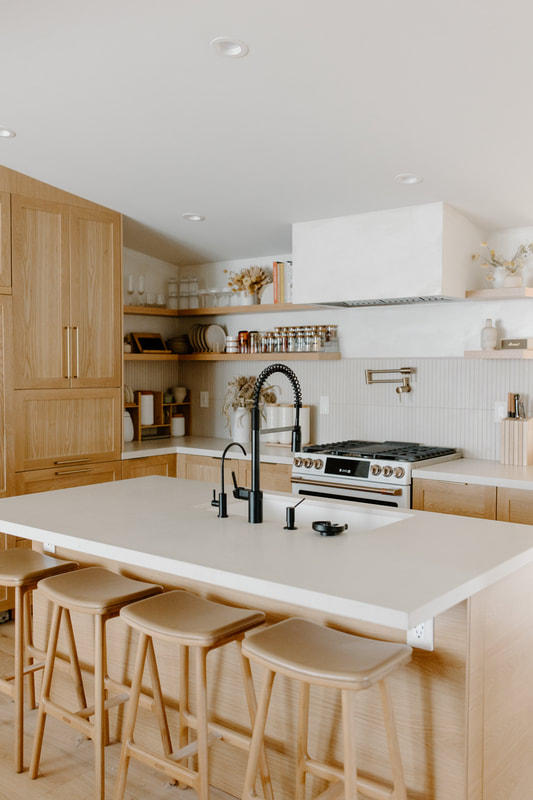
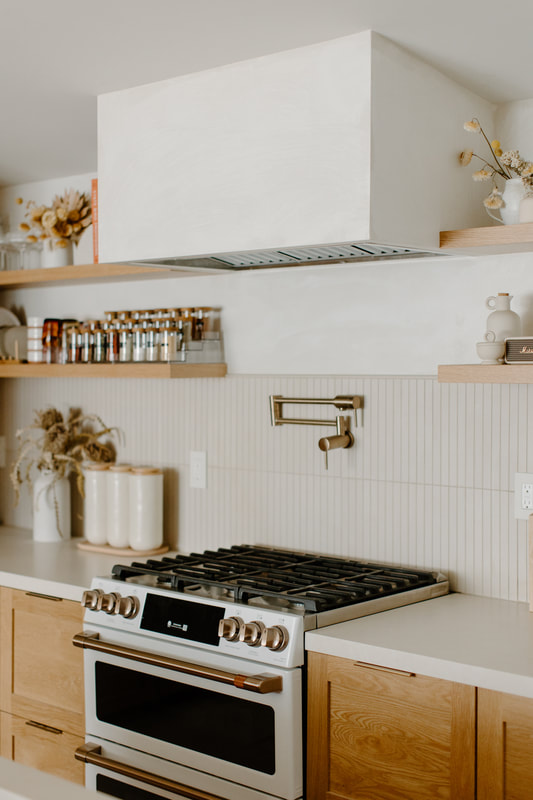
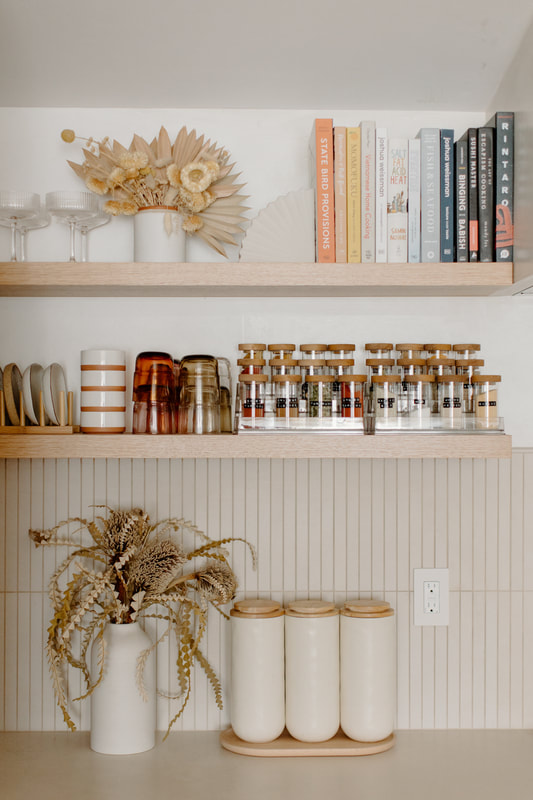
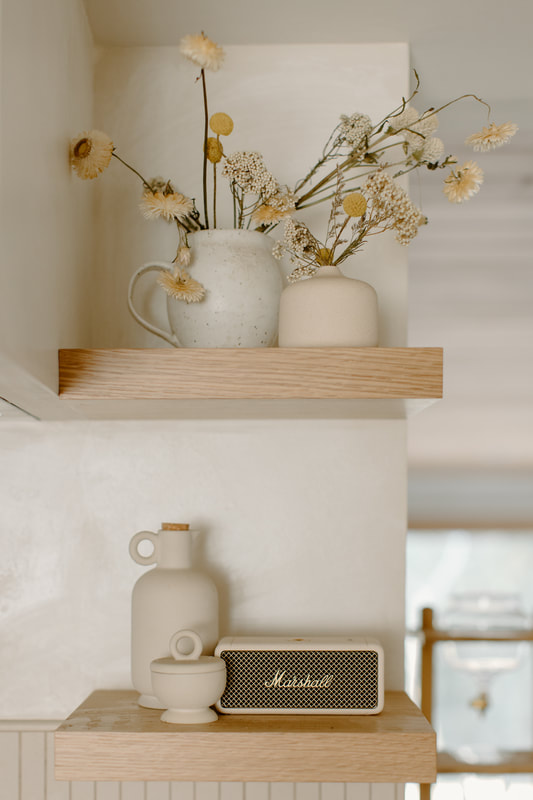
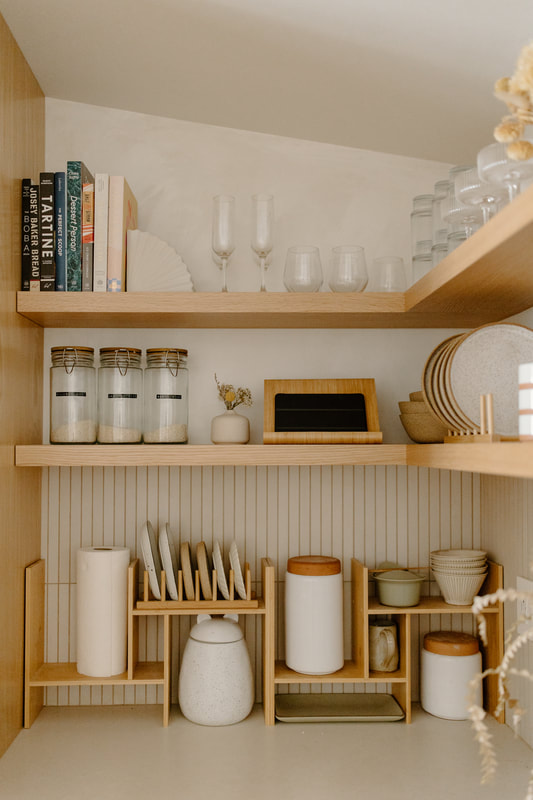
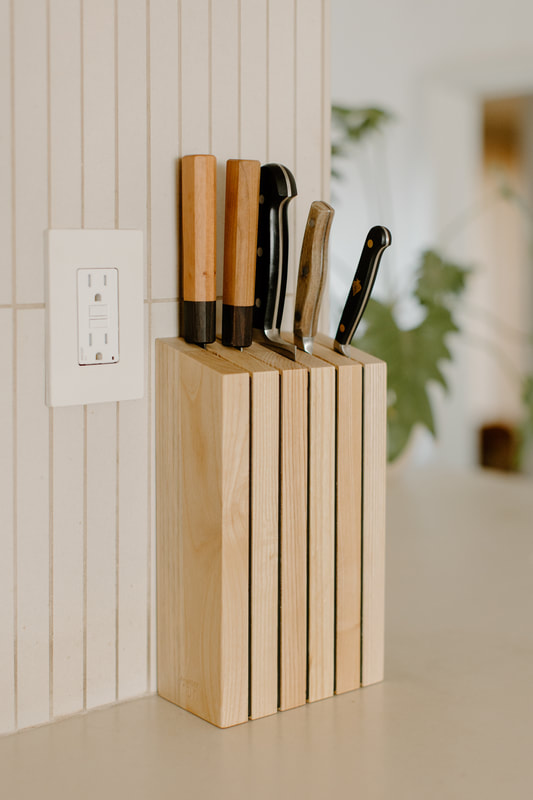
REFRIGERATOR: Fisher & Paykel | DISH DRAWER: Fisher & Paykel | STOVE: GE Cafe | HOOD: GE | FAUCET: Moen | SOAP DISPENSER: Kraus | SINK: Blanco | COUNTERTOP: Caesarstone | CABINETS: IKEA | CABINET FRONTS: Scherr's | HANDLES: Top Knobs Pennington, Top Knobs Europa | RUG: Ruggable | FLOATING SHELVES: Custom Floating Shelves | POT FILLER: Delta Faucet | COUNTER STOOLS: Article | DRINKING GLASSES: Our Place, Amazon | COUPE GLASSES: CB2 | SMALL BOWLS: Our Place | KNIFE BLOCK: Berghoff | SPEAKER: Marshall
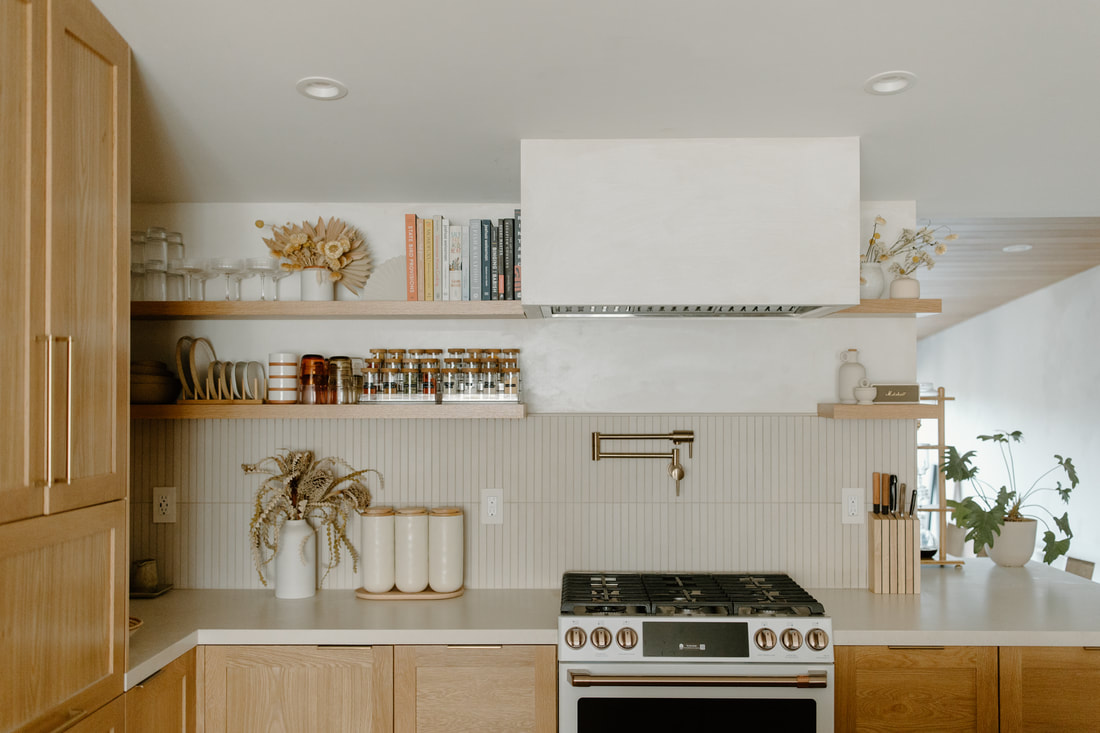
There are a million things to talk about in the kitchen! Choosing the kitchen layout was the first big decision. Before our kitchen was demolished, we emptied out all our drawers and laid everything out to see what the best configuration was. This helped us to see what width and height drawers we would need. Knowing that we had limited space to work with, we maximized every inch of the kitchen to ensure that each drawer was well utilized. We did sacrifice storage space by opting for floating shelves instead of upper cabinets, but we are so glad we did. Since the garage door sat right at the edge of the kitchen, we added additional pantry storage in the garage.
When it came to choosing cabinetry, we decided to go with IKEA because we loved how modular and customizable it was (in fact, we ended up adding a few extra inner drawers and swapping out a cabinet later in the process!) For cabinet fronts, we had looked at Semihandmade, which is the most well-known company for IKEA cabinet fronts. When we got the samples though, we realized that we didn't like how it looked, and how expensive it was for MDF and not real wood. After getting a few quotes, we decided to go with Scherr's white oak cabinet fronts. Getting the measurements correct was extremely stressful, though Scherr's was very helpful throughout the entire process (there were almost 100 emails sent back and forth) To really clean up the look, we added FastCap edge banding in natural oak color to all the front edges of the cabinets. This covered up all the white edges of the IKEA cabinets. For our appliances, we decided to go with built-ins for a seamless look. While that meant sacrificing space in the fridge, the plus side was that things would no longer get lost in the back. We decided to get a second, smaller refrigerator in the living room (which doubles as a beverage fridge!) and a chest freezer in the garage. The double dish drawer allows to run two separate, smaller loads, and the dual-fuel stove allows us to have a gas cooktop and electric oven for baking. Plus the double oven allows us to bake two dishes at different times and temperatures! With the kitchen being such a highly used room, we made intentional design choices to make cooking and cleaning easier. These included:
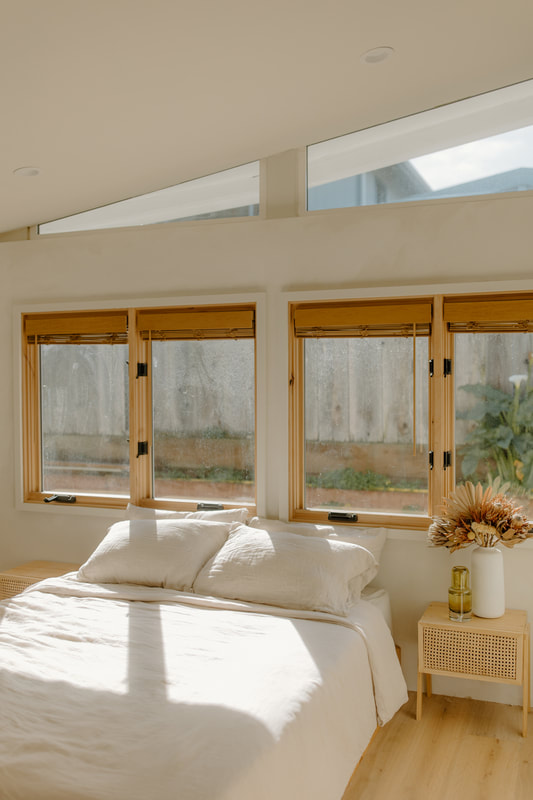
PRIMARY BEDROOM
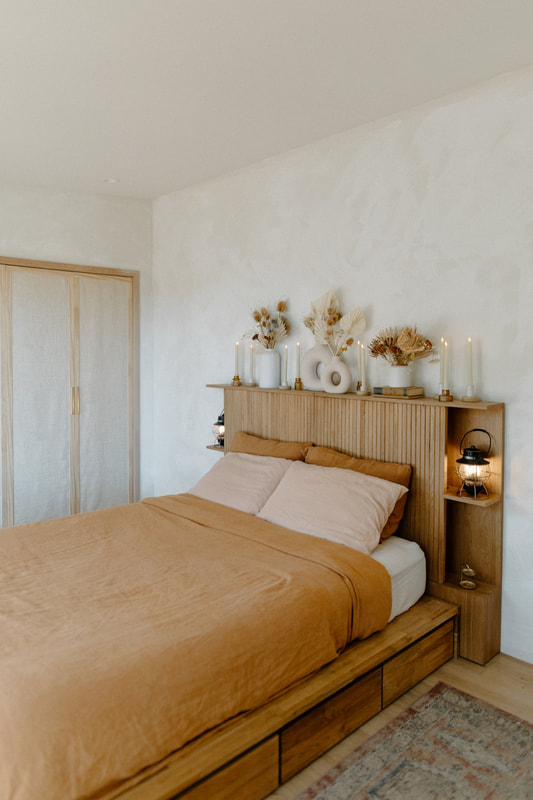
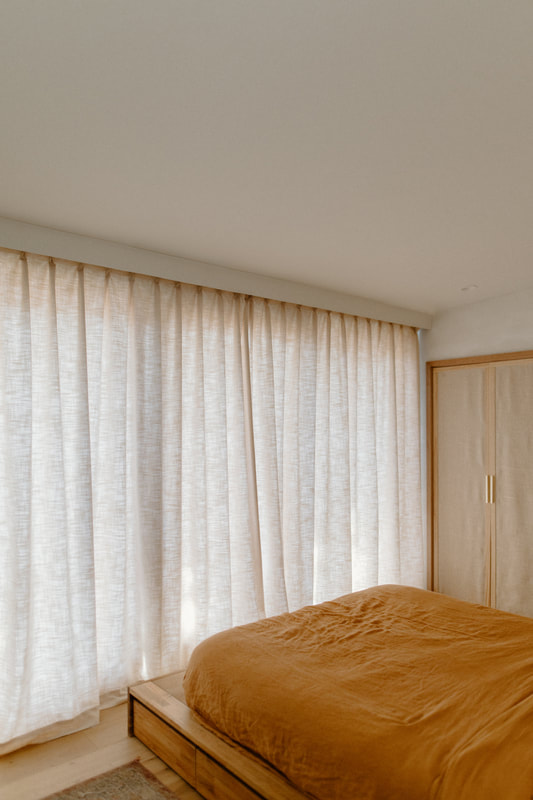
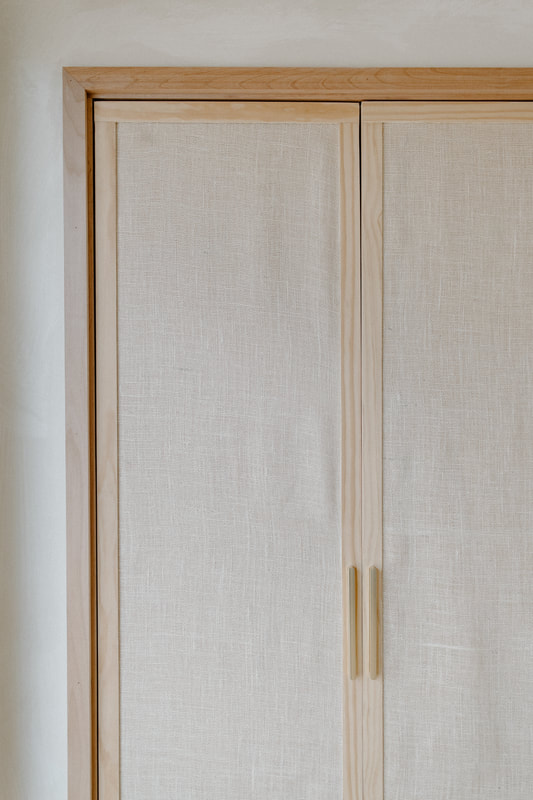
BED: MASHStudios LAXSeries | HEADBOARD: Article | LANTERNS: Barebones | VASE: Target, H&M | FLORALS: Afloral | CANDLES: Amazon | CANDLES: Amazon | CANDLEHOLDERS: Amazon, World Market | BEDDING: Bedthreads | CURTAIN: Two Pages Curtains | CURTAIN PELMET: DIY | CLOSET BASE: IKEA | CLOSET DOORS: DIY
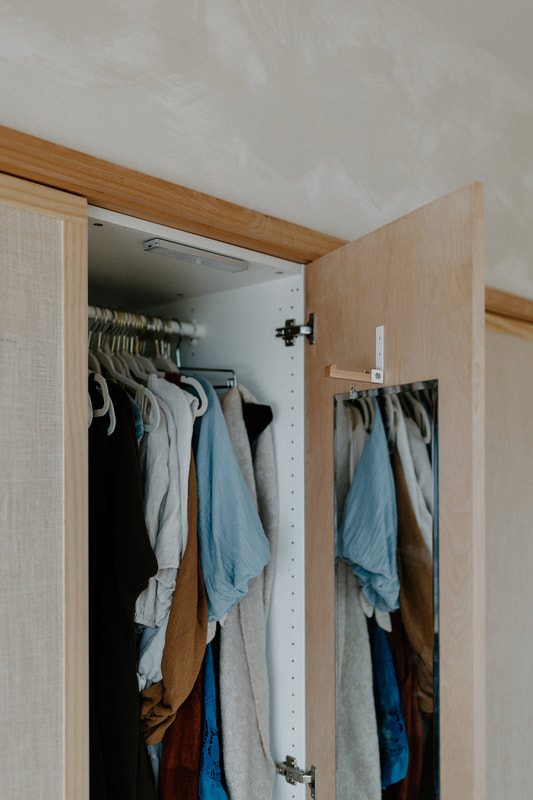
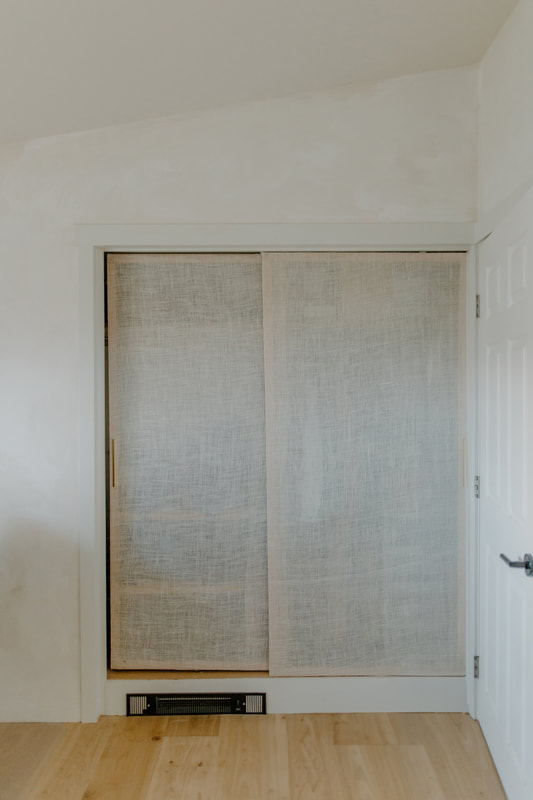
The first major project we did in this room was the IKEA Pax closet custom doors. When designing our closet, we liked how modular IKEA was, and how we'd be able to change it up later if needed. Our contractor built the framing around it so that it would look built in. We didn't like how any of the IKEA doors looked, and found custom doors to be really expensive. The solution - build our own doors! We purchased plywood and a Kreg Jig specifically for drilling hinge holes. After watching a few Youtube videos, we carefully made the measurements and drilled the holes. Attaching the decorative trim was another challenge - though we had wanted to wrap the trim in burlap fabric like our other closet doors, we realized that it would be too difficult to attach 1/4" trim to the 1/2" doors. We ended up changing the design and put the burlap under the trim. Our measurements weren't exact, so the doors were all slightly too large and didn't close properly. This meant that we had to sand all the doors down so they would close smoothly. Once the doors were done, we also added an outlet in the middle closet for a steamer, floor length mirrors inside the doors, and a foldable hook for hanging clothes. For lighting, we added in rechargeable motion sensor lights to the top of each closet that attached with magnets.
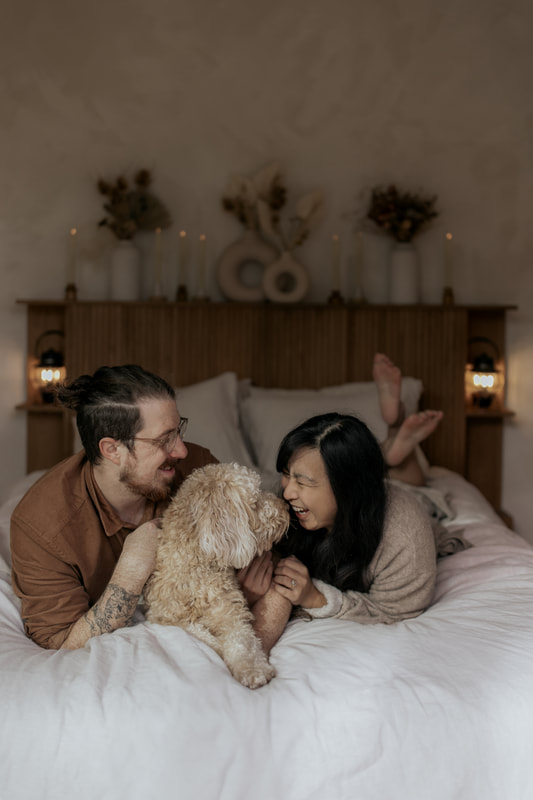
The second project we did was the curtain pelmet, or the cover. Though we originally didn't want to do curtains because we didn't want to cover up the beautiful wood doors, we realized it was our best option. Our doors were just slightly too large for what we originally wanted (which were motorized outdoor shades). To cover up the curtain rod, we cut two long pieces out of MDF and attached them to support pieces that were attached to the ceiling. With some wood filler and paint, it blended right into the ceiling! The curtain pelmet really made a huge difference, and the closet doors gave the room so much personality. Some other design choices we made were installing a switch by the bed to turn on and off lights, hiding charging cords behind the headboard, and keeping our our bedframe which had drawers underneath for additional storage. PRIMARY BATHROOM
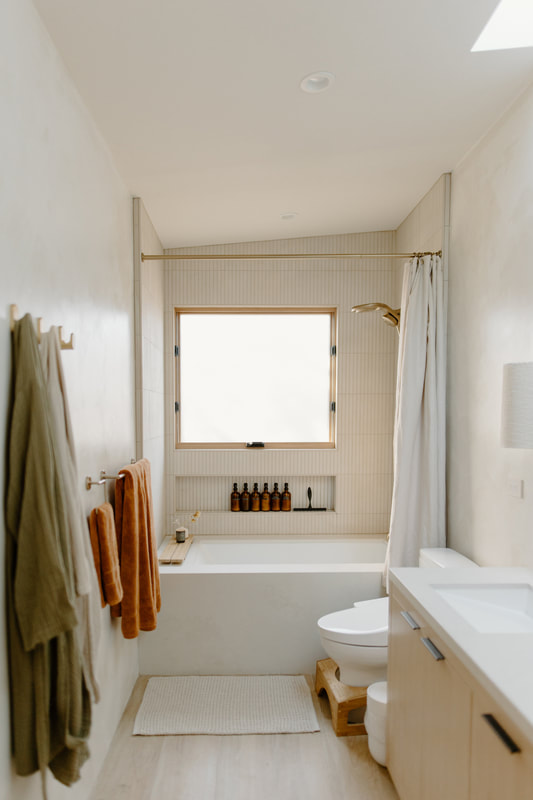
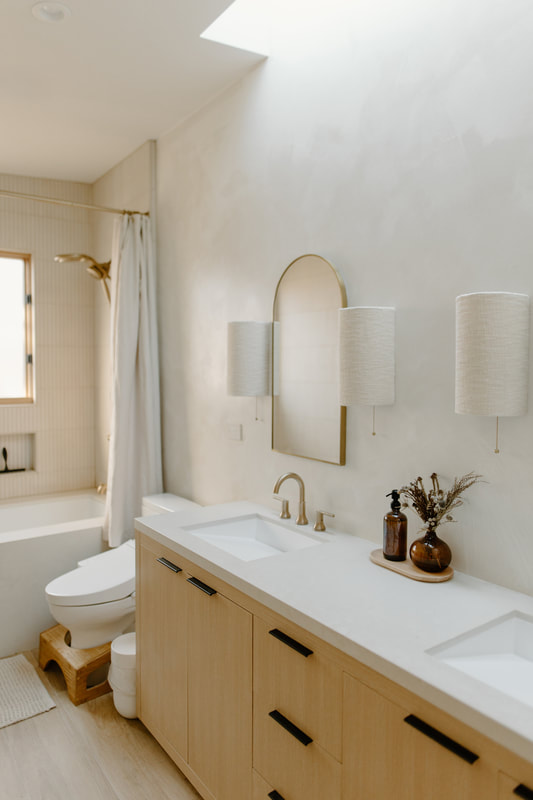
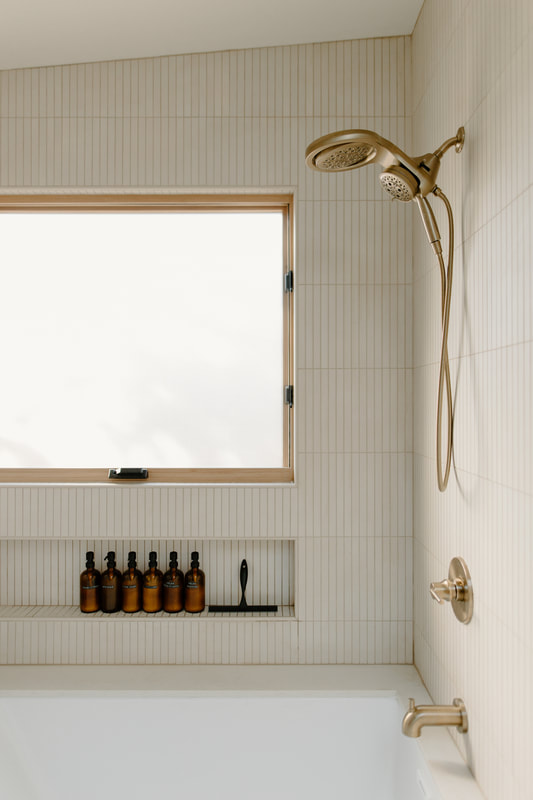
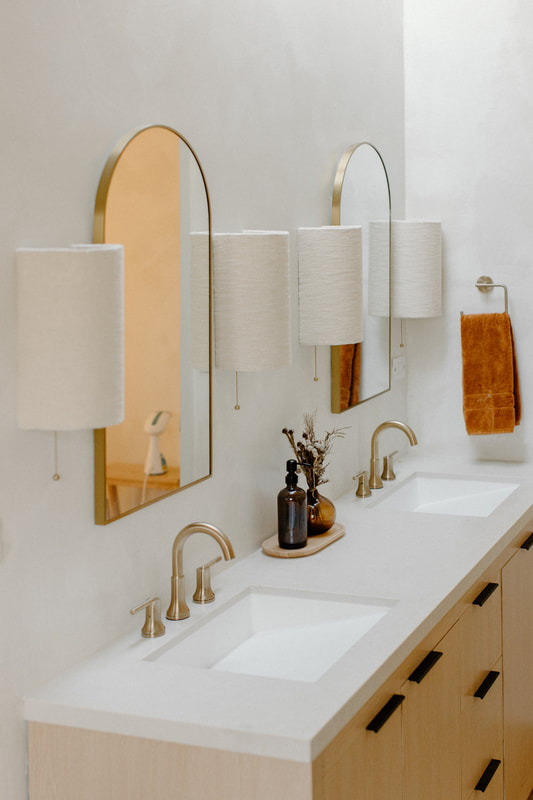
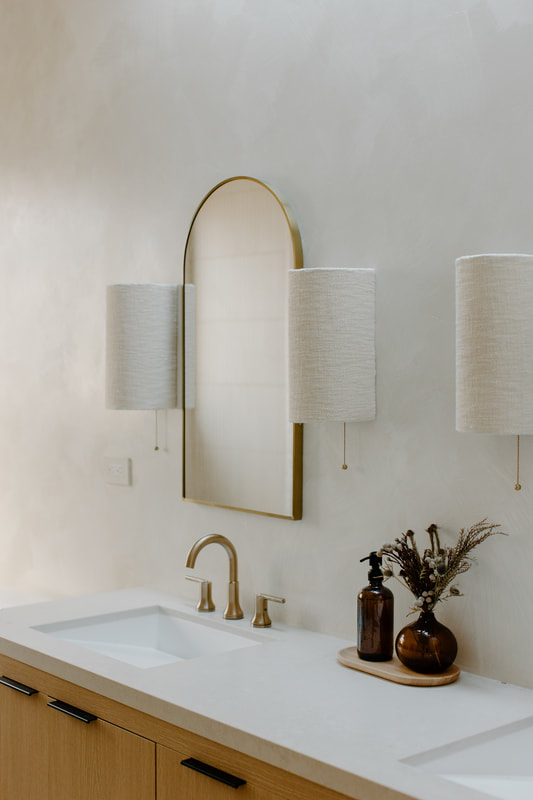
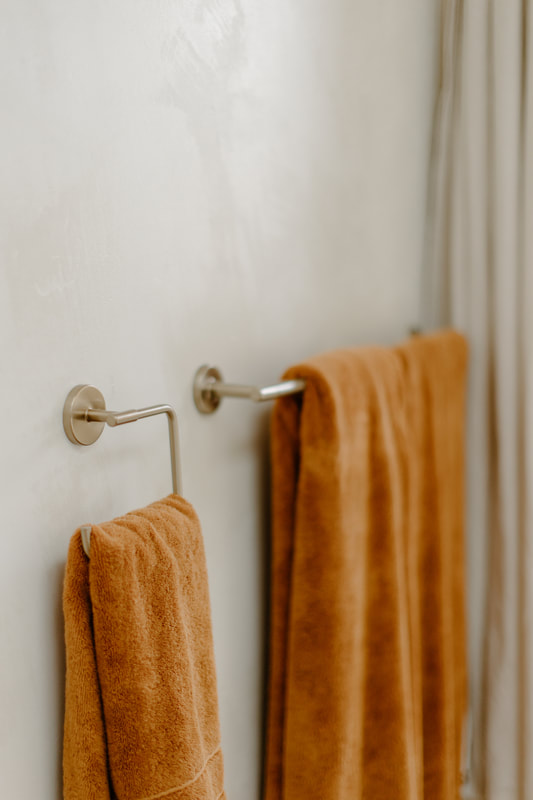
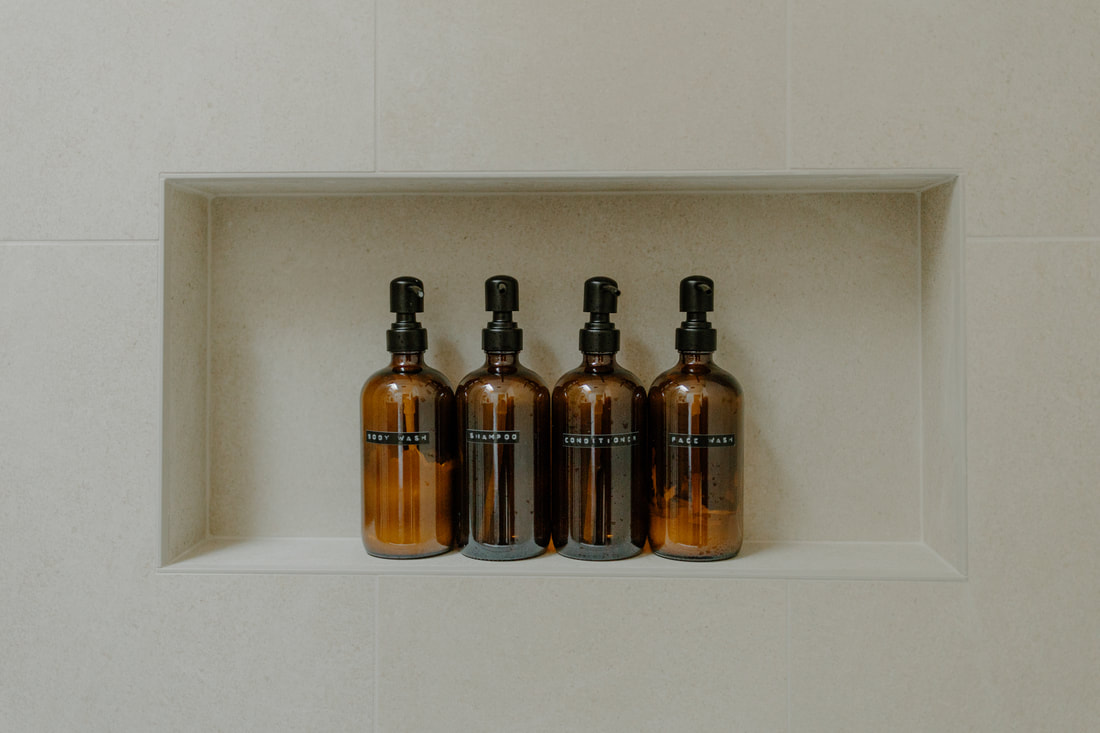
BATH SURROUND TILE: Bedrosians | FLOOR TILE: Bedrosians | COUNTERTOP: Caesarstone | BATHTUB: Mansfield | VANITY: Wyndham Collection | MEDICINE CABINETS: West Elm | SCONCES: Anthropologie | SINKS: Badeloft | BATH MAT: West Elm | SHOWERHEAD: Delta Faucet | FAUCET: Delta Faucet | Towel Bar: Delta Faucet | TOWEL RING: Delta Faucet | TOILET PAPER HOLDER: Delta Faucet | TOILET: Toto | SHOWER CURTAIN: Quince | CURTAIN RINGS: West Elm | CURTAIN ROD: Amazon | VANITY TRAY: IKEA | TUB TRAY: H&M | BOTTLES: Amazon | ROBES: Parachute | TOWELS: Brooklinen
One of the best decisions we made in this bathroom was adding two skylights. These two skylights are connected to feel like one large skylight, and provide so much natural light to the room. Other touches we added: an outlet in the vanity for a hair dryer, an outlet for a bidet, and recessed medicine cabinets (you wouldn't even think that there's a whole cabinet behind the arched mirror!) We chose not to do baseboards or backsplash, which meant being more careful about cleaning up water spills but having a cleaner look.
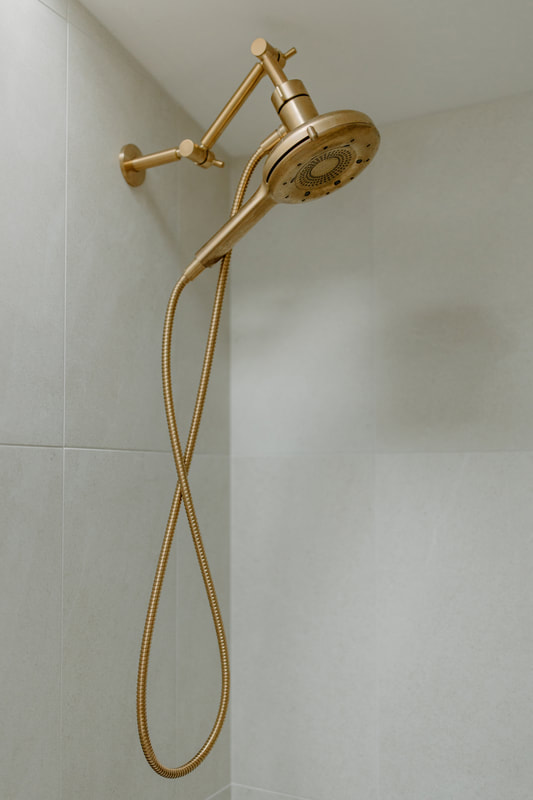
The tub deck was something we fell in love with early in the process when we saw it on Pinterest, so we had our countertop fabricator install the same material we used in our kitchen. And it looks amazing! One thing we did not think about though was how tall our tub was since we chose a soaking tub. With the extra height and width, it did make it slightly challenging stepping into the tub (our solution: a project not pictured here, which is a DIY step made out of leftover floor tile) and it was not sloped to drain (our solution: we needed to squeegee the deck every time after showering). Leading to the next problem we ran into: the shower glass. We had intended on putting in a half door frameless shower glass, again based off of a photo we saw on Pinterest. Because the tub deck was not sloped to drain, we realized we couldn't do a frameless shower glass because it would allow water to leak through. We looked at framed shower glass, but didn't like how thick the hardware was, and that it only came in black or brass which was a yellow gold. In the end, we chose to go with a shower curtain to allow us access to the entire tub and reduce water leakage. Another challenge we ran into was matching gold fixtures. We knew this would be an issue early on, but didn't want to do black because it felt too farmhouse modern. We chose Delta champagne bronze in all our fixtures, which was a warmer gold. We tried a few different curtain rods before finally finding one that matched (thanks to other people running into the same issue and posting on Houzz!) and spray painted our curtain rings with Rust-oleum Satin Bronze which blended in perfectly. Overall, we absolutely love how the bathroom looks and feels! But if we were to do it over again, we would've thought more about the tub deck and how it would feel to use. Lessons learned! LIVING ROOM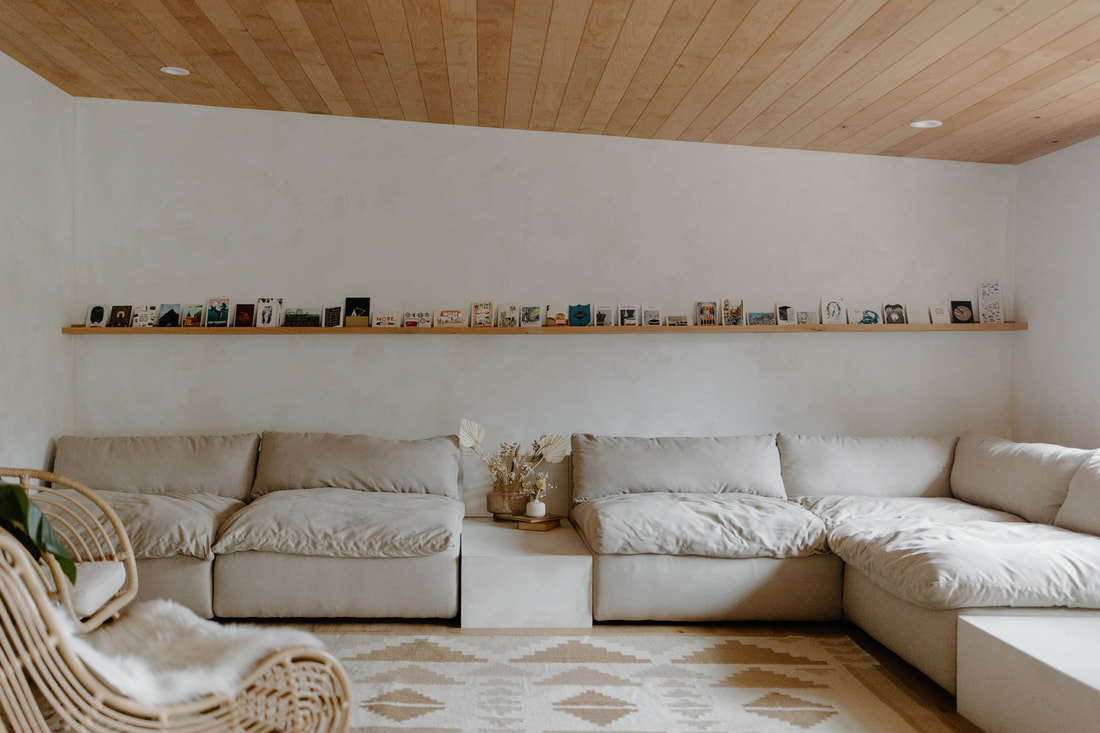
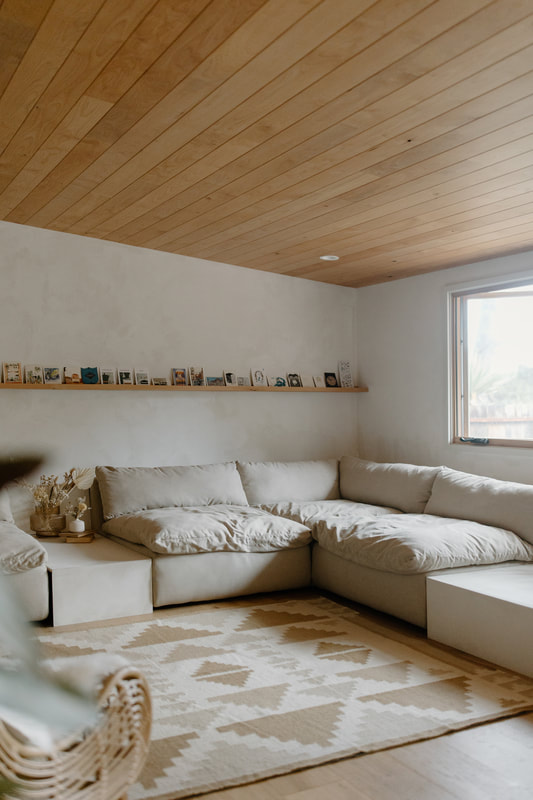
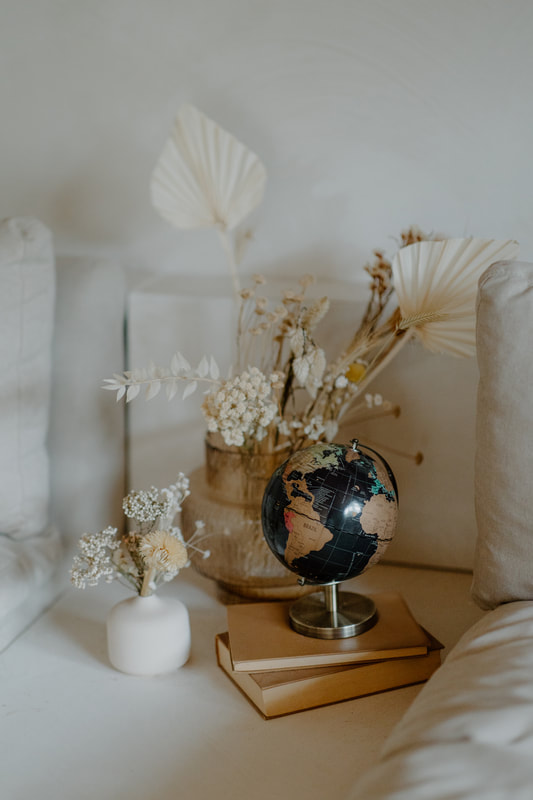
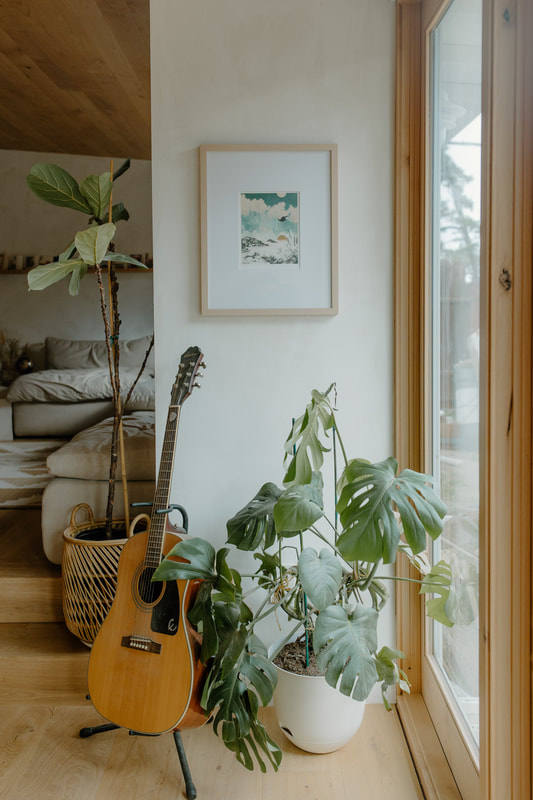
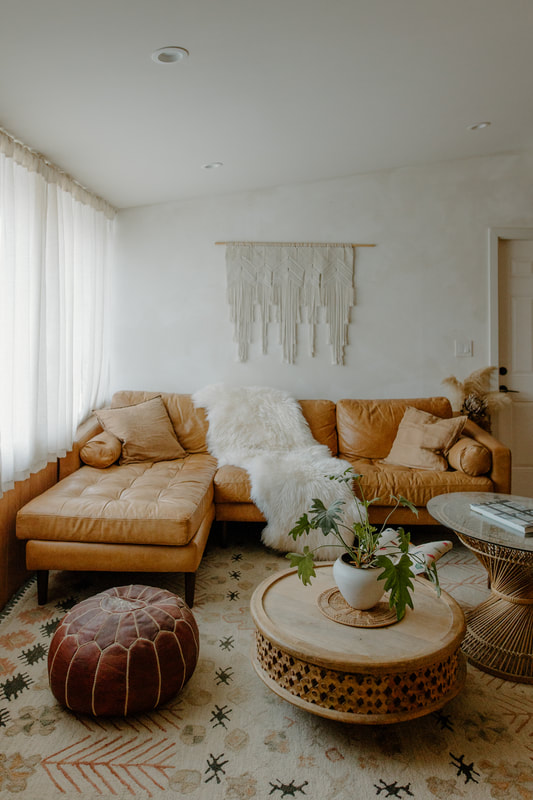
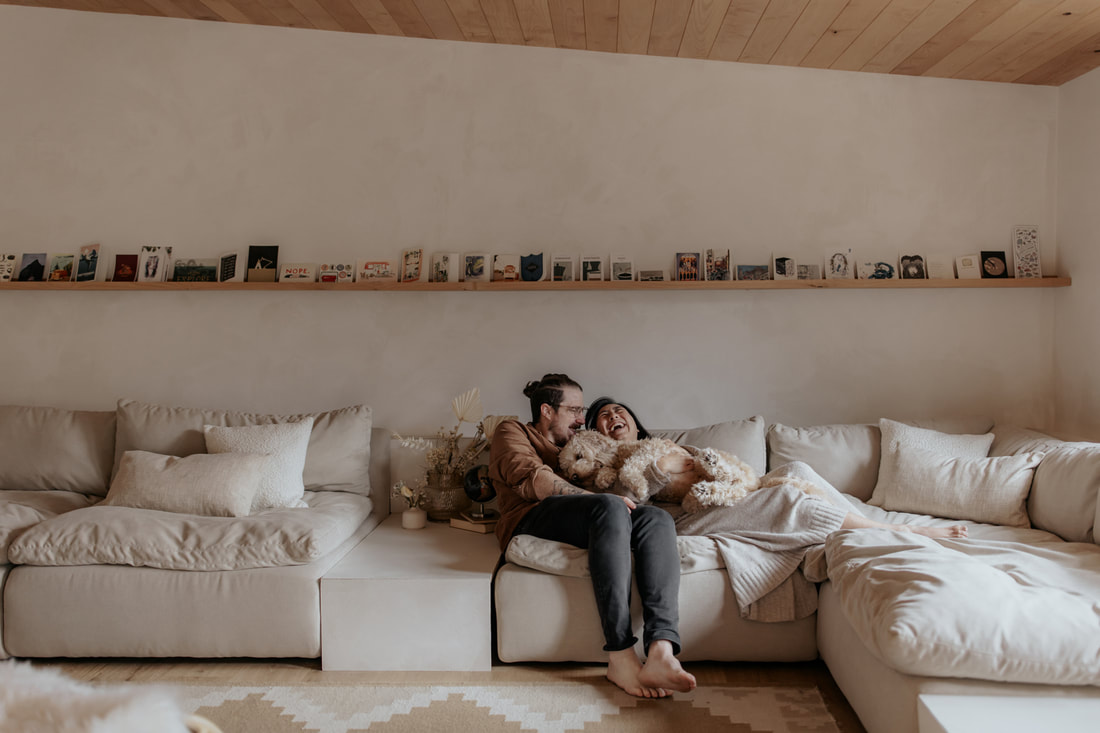
SOFA: Floyd | RUG: Citizenry | ACCENT CHAIR: Article, IKEA | VASES: H&M | FLORALS: Afloral | GLOBE: Luckies of London | SHELF: DIY | TABLE: DIY
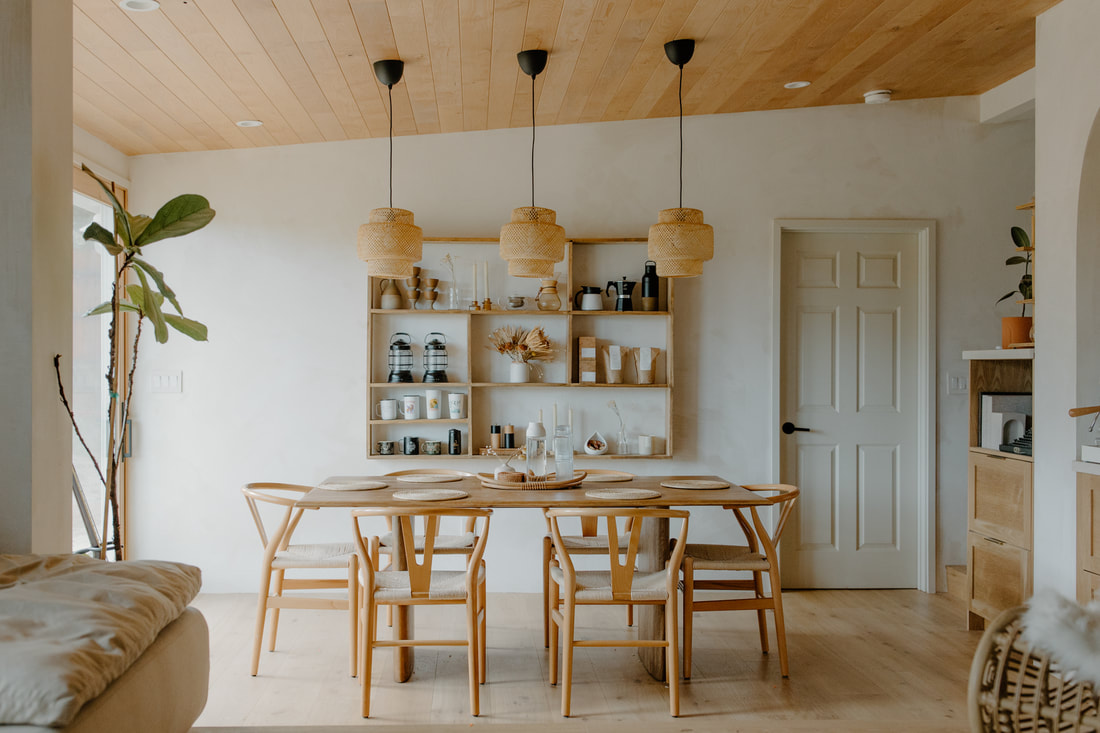
We have always loved wood ceilings, and we knew we wanted to add it somewhere in the house. The new living room and dining room was the perfect place. It was one of the best decisions we made, as it truly transforms these rooms and makes them feel so much cozier. The ceilings were done in alder wood to match our doors and windows.
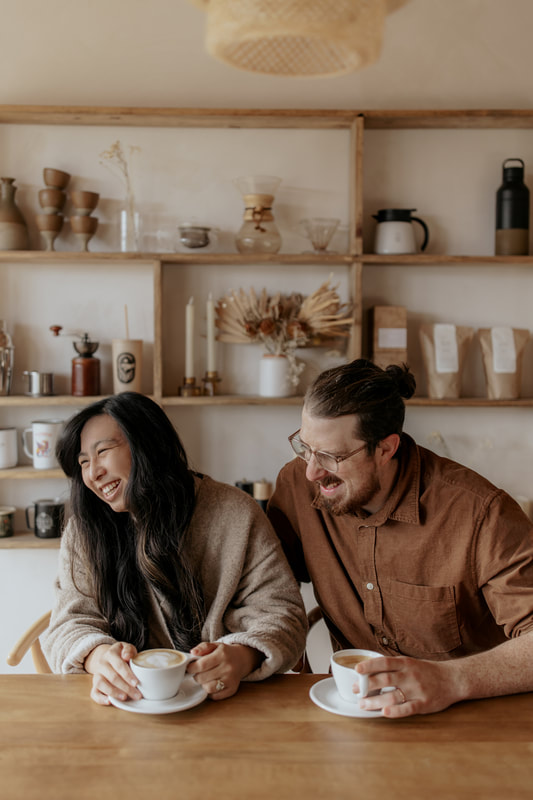
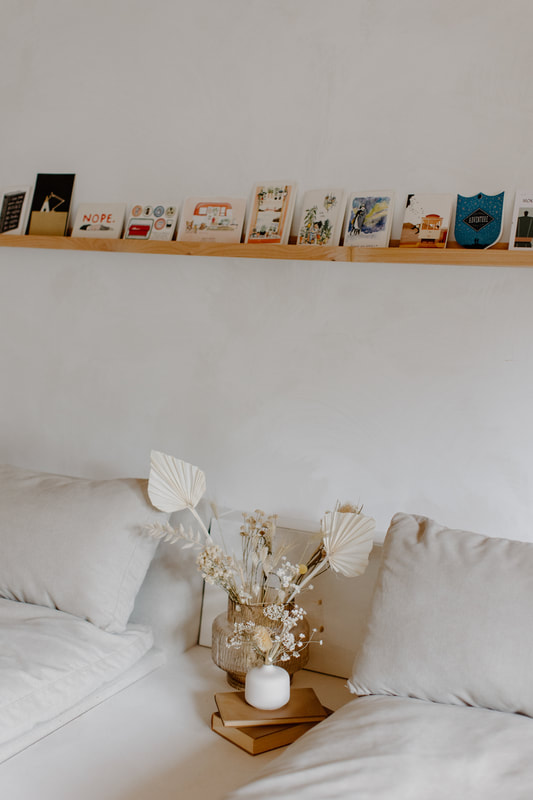
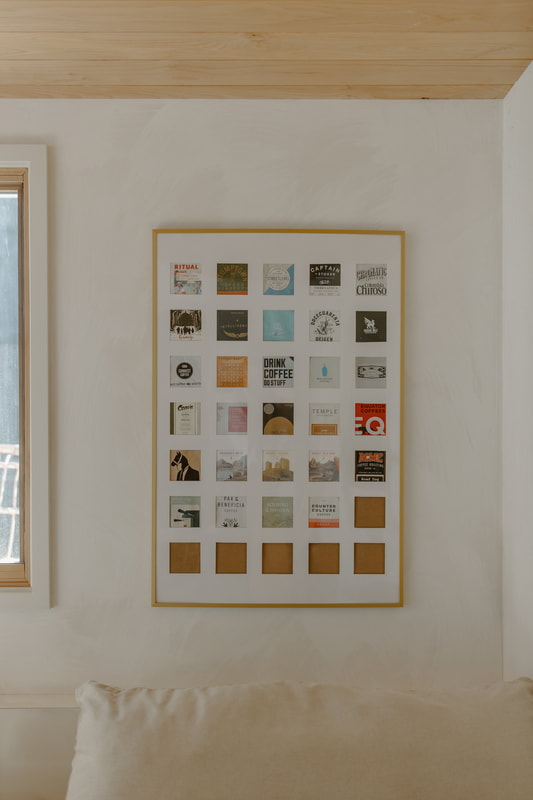
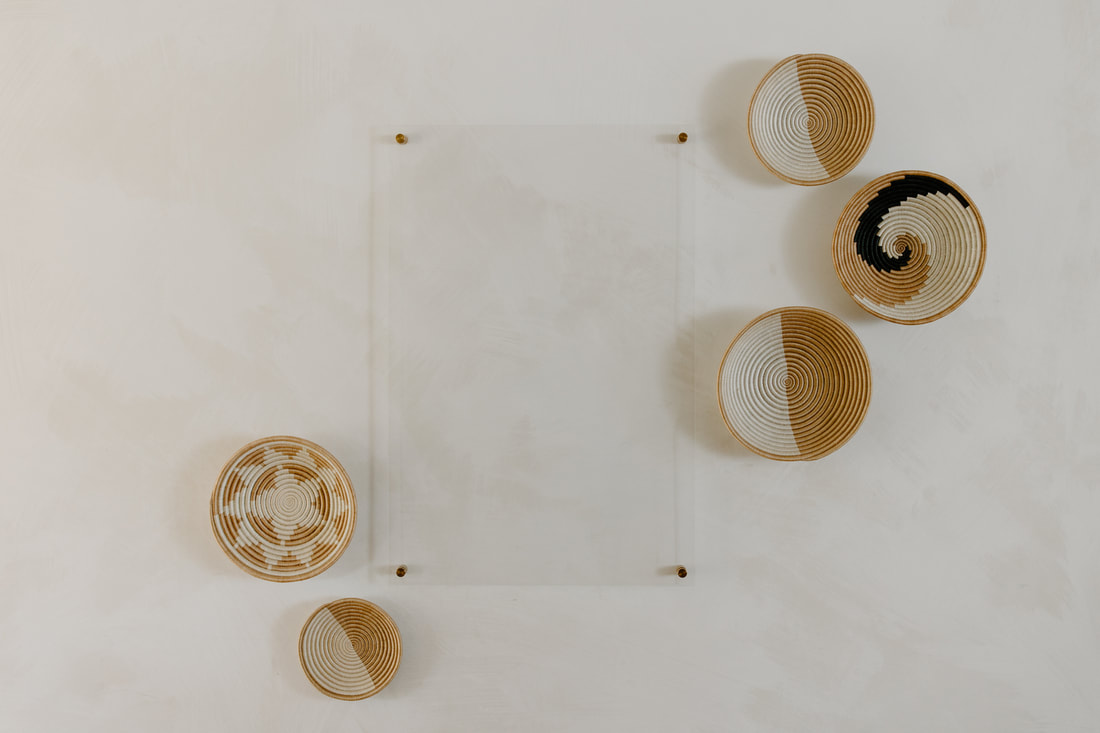
Another centerpiece of the room was the idea of a built in sofa. We loved the look of a sofa being wall-to-wall, and eyed many designs that had benches with cushion seating. In the end, we decided having a true built-in would be too permanent of an install, and looked far and wide for the perfect sofa. We looked at modular sofas from so many different companies: Article, Poly & Bark, Burrow, West Elm, Room & Board, CB2, Crate and Barrel, Rove, Hay, even custom furniture makers. With each sofa, we would design what it would look like in the space to scale using Photoshop to see how much leftover space would be on each wall. In the end, we went with Floyd's new Sink Down Sectional. With the leftover space in between the modular couches, we made custom tables as well as charging stations and drink console tables hidden behind the sofa. To fill the wall behind the sofa, we built a wall-to-wall shelf out of leftover alder wood from our ceilings. While simple in theory, we did run into challenges getting the shelf to fit exactly wall-to-wall. We built two shelves that were the same exact size, and connected them with Kreg Jig screws. The shelf was then mounted onto studs in the wall. It became a great place to display all the cards we have collected over the years from our travels and local craft craft fairs! To go with the coffee bar in the adjoining dining room, we made this DIY coffee bag display. We had to been wanting to do a project with coffee bags for a while, and after many iterations, we finally came up with this collage idea! Feel free to check out the DIY tutorial here if you want to make your own! The closet was the only surviving part of this room from before the remodel. We kept the bifold doors we had made for it, and decided to add an outlet into the closet to be able to add a TV with a retractable arm mount. DINING ROOM
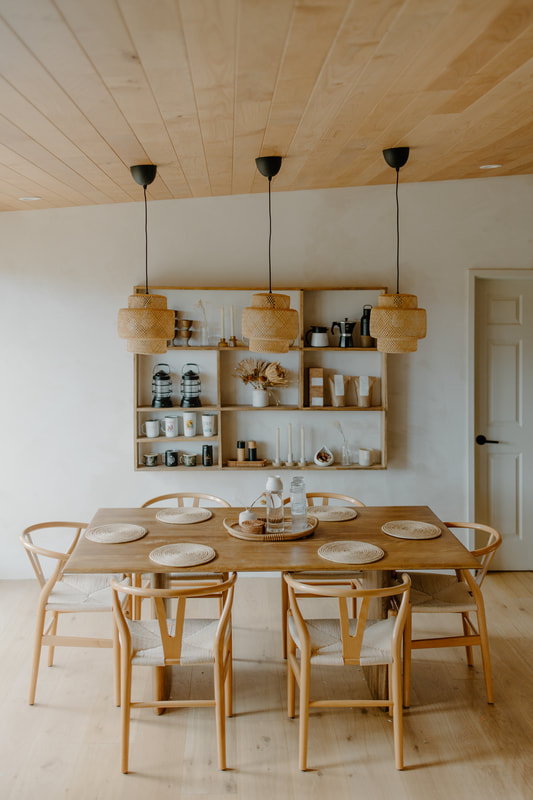
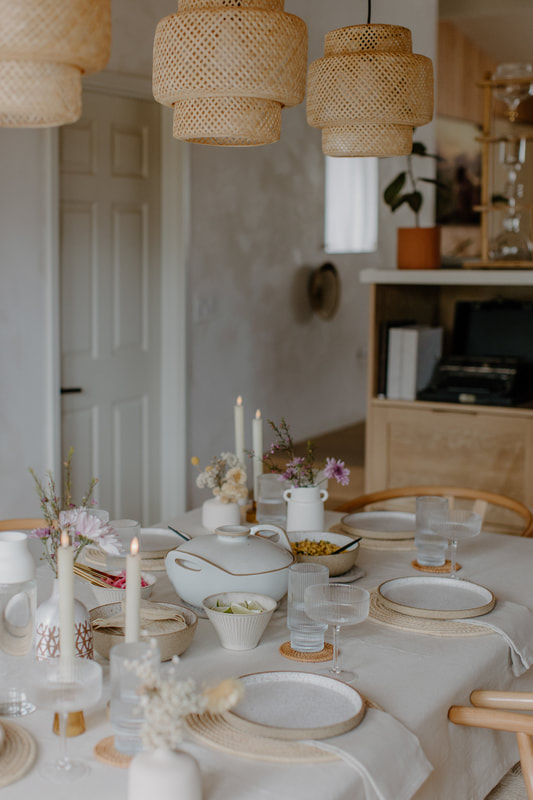
TABLE: West Elm | CHAIRS: Poly & Bark | SHELF: DIY | PENDANT LIGHTS: IKEA | SHELF: DIY | WATER CARAFE: Kinto | LANTERNS: Barebones | FRAME: Target | PLANTER: Target
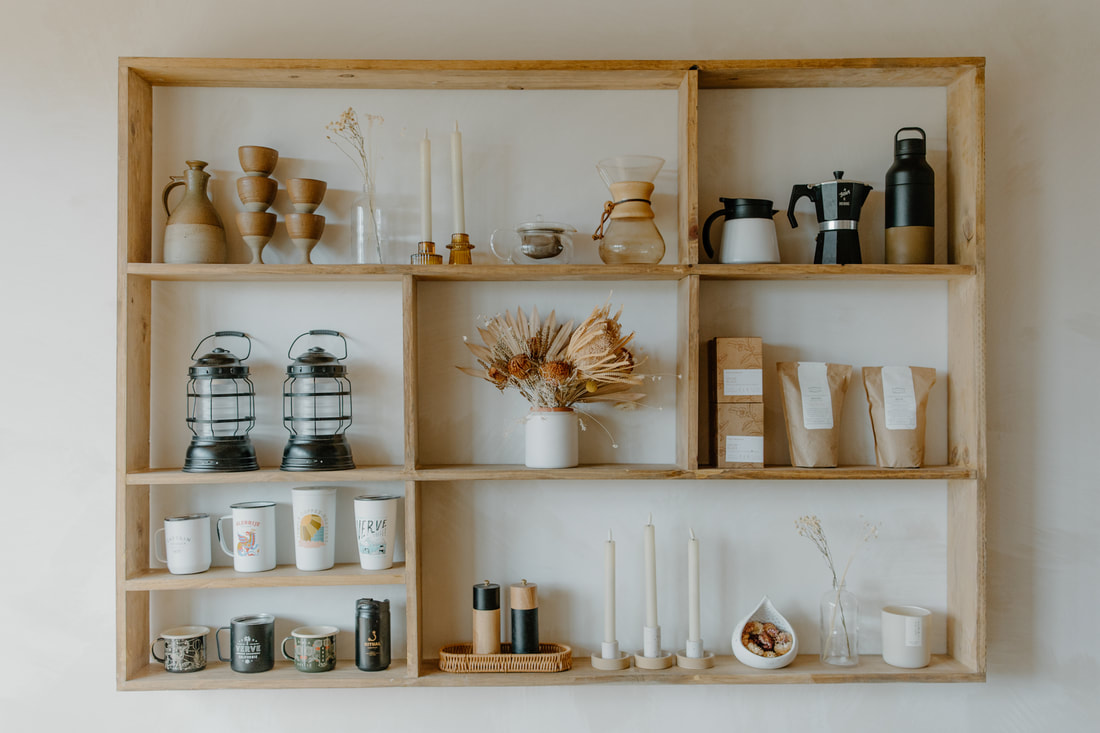
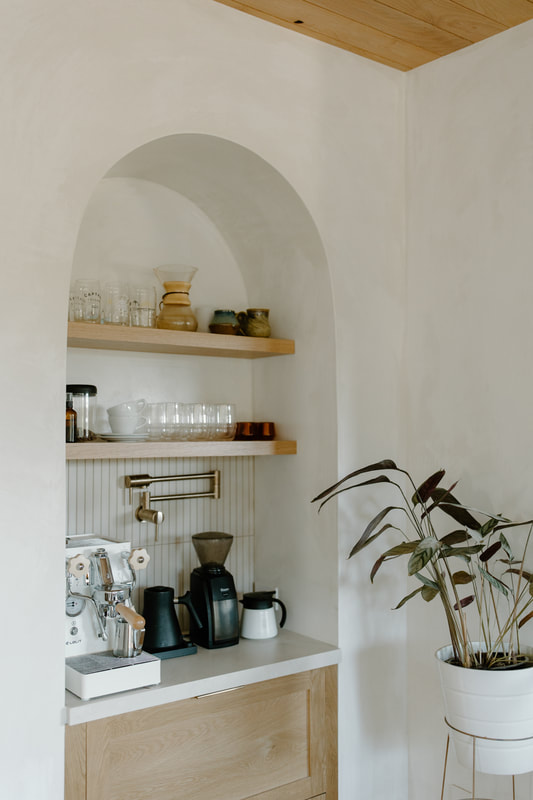
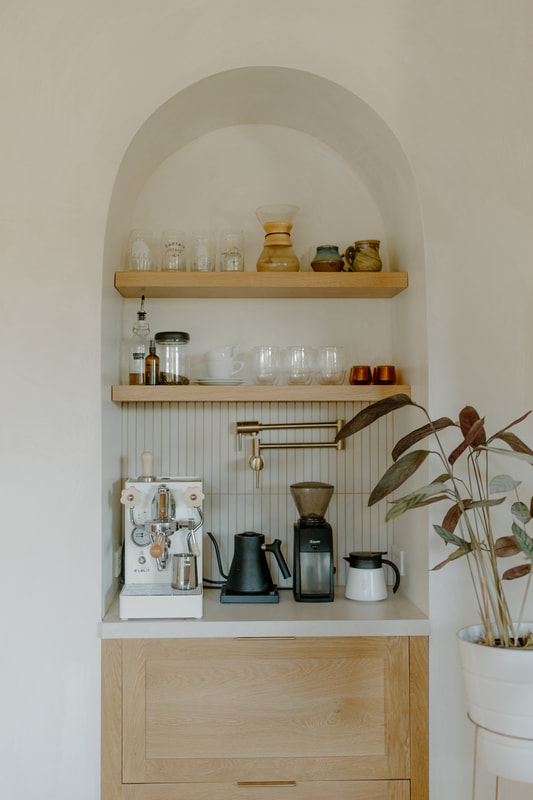
COUNTERTOP: Caesarstone | CABINETS: IKEA | CABINET FRONTS: Scherr's | HANDLES: Top Knobs Pennington, Top Knobs Europa | FLOATING SHELVES: Custom Floating Shelves | POT FILLER: Delta Faucet | ESPRESSO MACHINE: Lelit | KETTLE: Stagg | POUROVER: Chemex | COFFEE SERVER: Hario | KYOTO STYLE COLD BREW DRIP: Yama | MUGS: Kinto, Hearth, NotNeutral
Our previous layout didn't have room for a dining table, and we definitely felt that lack of space that when we hosted dinner parties like Oktoberfest and Friendsgiving. With it being cold most of the time in the Monterey Bay, we knew we wanted an indoor dining room. This space was one we had prioritized when looking at where we could add square footage.
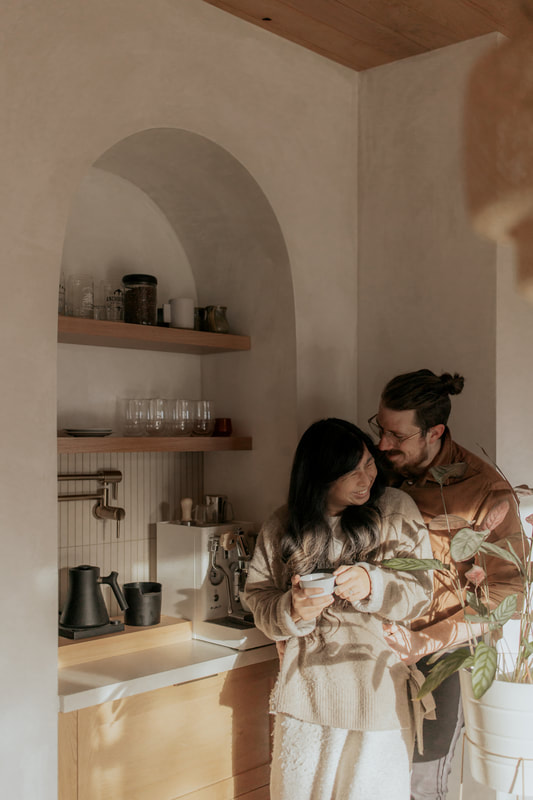
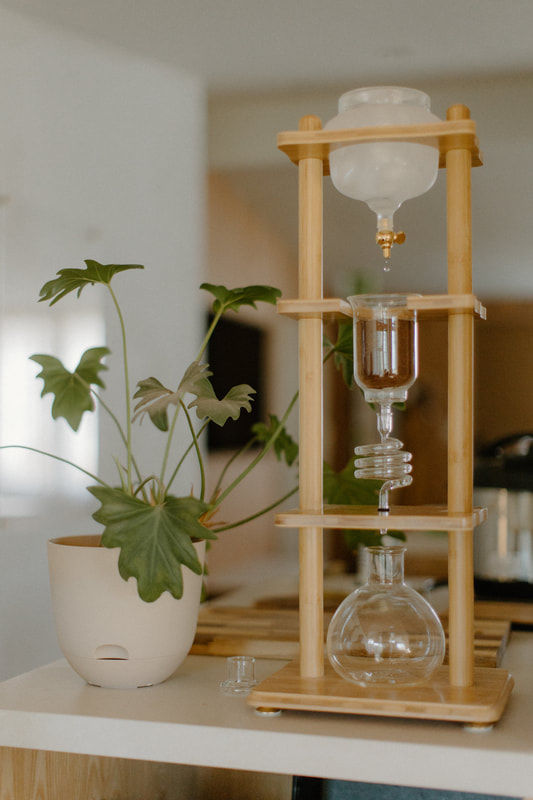
The coffee bar was a late add in the design process, but definitely one of our favorites! We had always loved arched built ins, so it ended up being a dream come true when we were able to add a space where Keith could finally put all of his coffee equipment. We even added a pot filler so he wouldn't have to go back and forth to the kitchen. With the space beside it, we extended the countertop over and added cabinets underneath. This made for a great spot for our Kyoto-style cold brew tower. ENTRYWAY + FAMILY ROOM
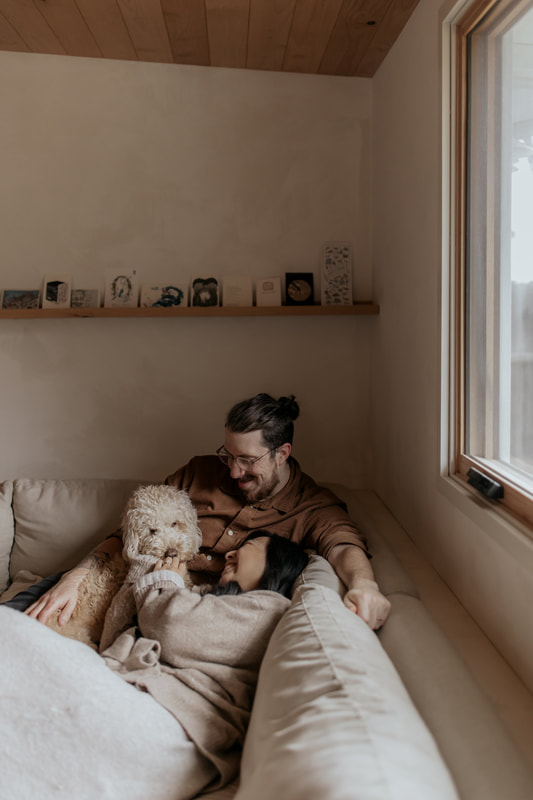
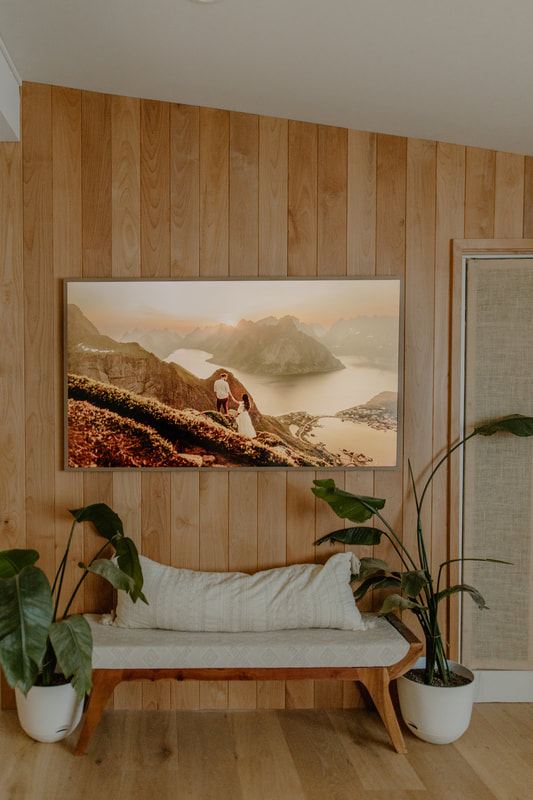
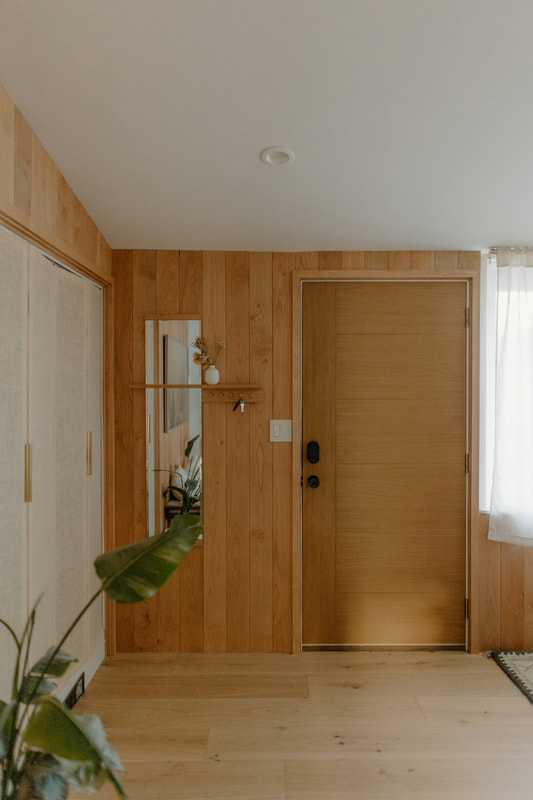
TV: Samsung the Frame | CURTAINS: Ryb Home | SOFA: Poly & Bark | RUG: Lulu & Georgia | COFFEE TABLE: West Elm, Thrifted | POUF: Marrakech Style | DOOR: MP Doors | HOOK RACK: Virginia Sin | MIRROR COAT RACK: DIY
This mirror coat rack was a very late addition to the house - it was a project born out of extra materials! Because we had so much extra alder wood from our tongue and groove ceilings, we decided to panel a few walls with it. With still more leftover wood, we used scrap pieces to create this mirror coat rack. We looked at many different coat racks and used them as inspiration for this one. We already had a floor length mirror from Target (this was also extra, because we got a replacement due to the original order not having the screws), so we custom built the shelf and pegs to fit the size of our wall. To make sure the mirror worked for both of us, we took many measurements and tested out the mirror placement to find the perfect height and distance from the wall. To hold the mirror in place, we used the groove side of the tongue and groove boards to perfectly slide the mirror into place. The pieces were all then attached to the wall using nails and filled with wood-colored filler. The pegs on the end also have earth magnets for holding keys.
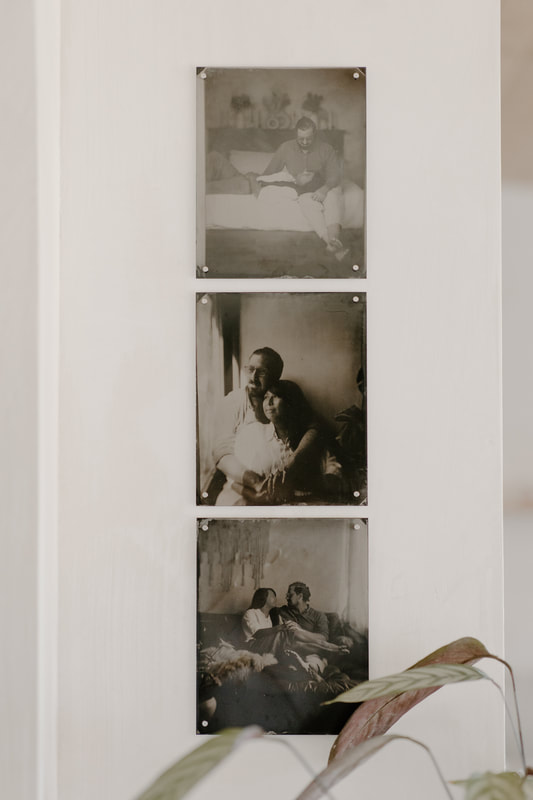
Most of the family room remained the same as before, but the wood panels added a lot of warmth to the room. Our contractor also helped us hide the TV cord behind the closet, which cleaned up the walls and truly made the Samsung Frame TV feel like a framed piece of art. This TV was one of our first purchases we made when we moved in, and to this day it has been one of our favorites! As photographers, we have way too many photos and not enough wall space, so it's the perfect way to share all of our travels and adventures. OFFICE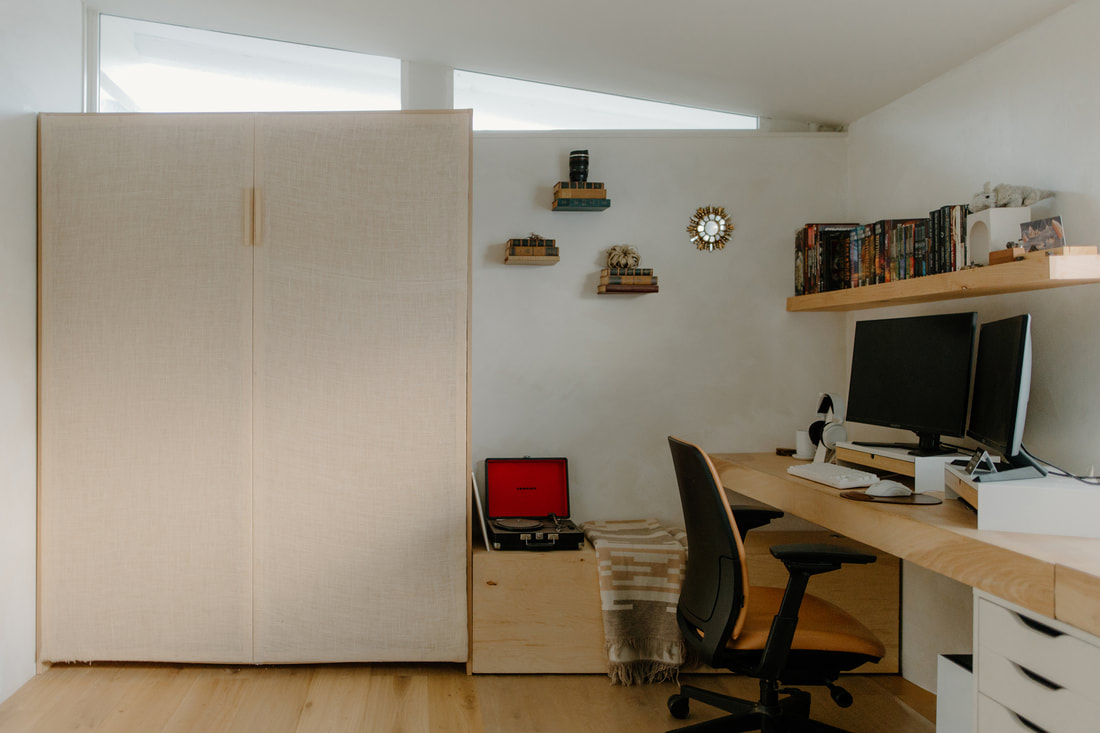
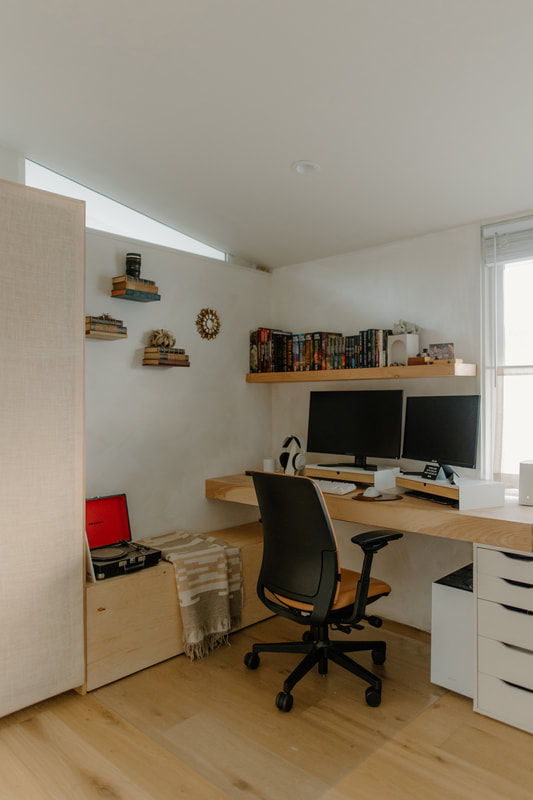
TABLE: DIY | BENCH: DIY | MURPHY BED: DIY with Create-a-Bed Kit | BLANKET: Pendleton | CHAIR MATS: Amazon | MOUSEPAD: Amazon | CURTAIN: Shop By ELENA | BOOK SHELVES: DIY | DRAWERS: IKEA
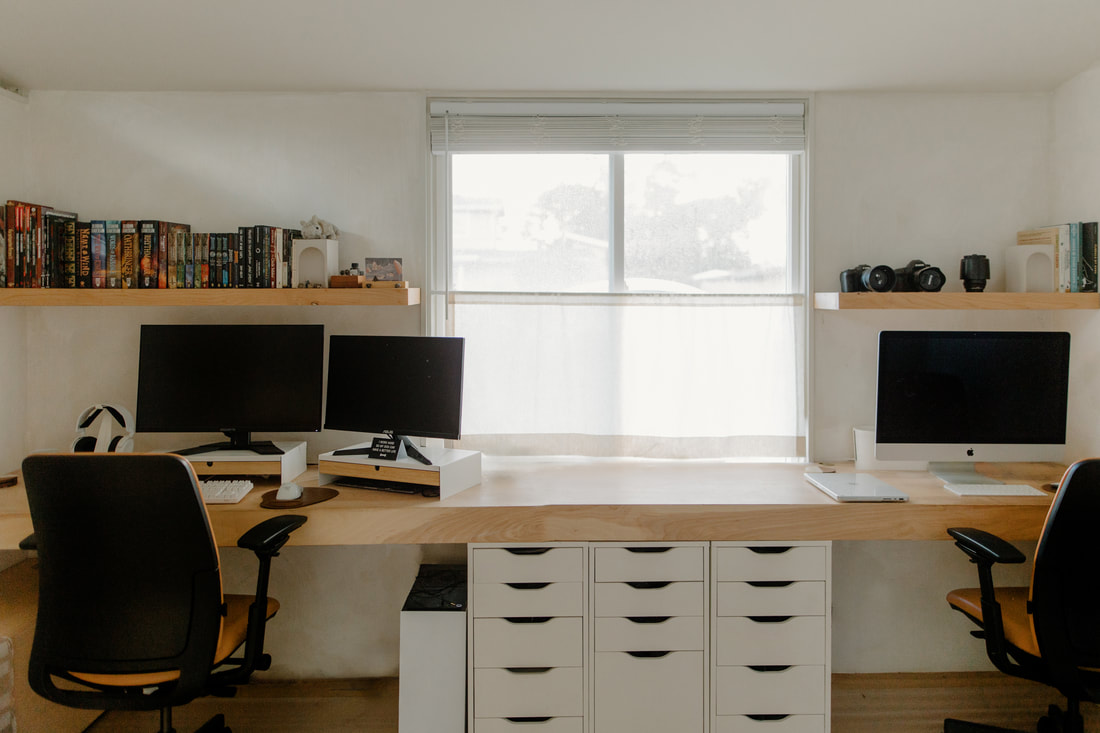
This office used to be a bedroom, but we chose to convert it into an office and guest bedroom since it was the largest bedroom. With both of us needing in-home offices, it was so important to us that we had a large enough desk to work on. We custom built a wall-to-wall floating desk, supported by a 2x4 frame that's attached to the wall. Underneath the desk are three IKEA Alex drawers for storage. The floating shelves were also custom built out of the extra alder wood we had.
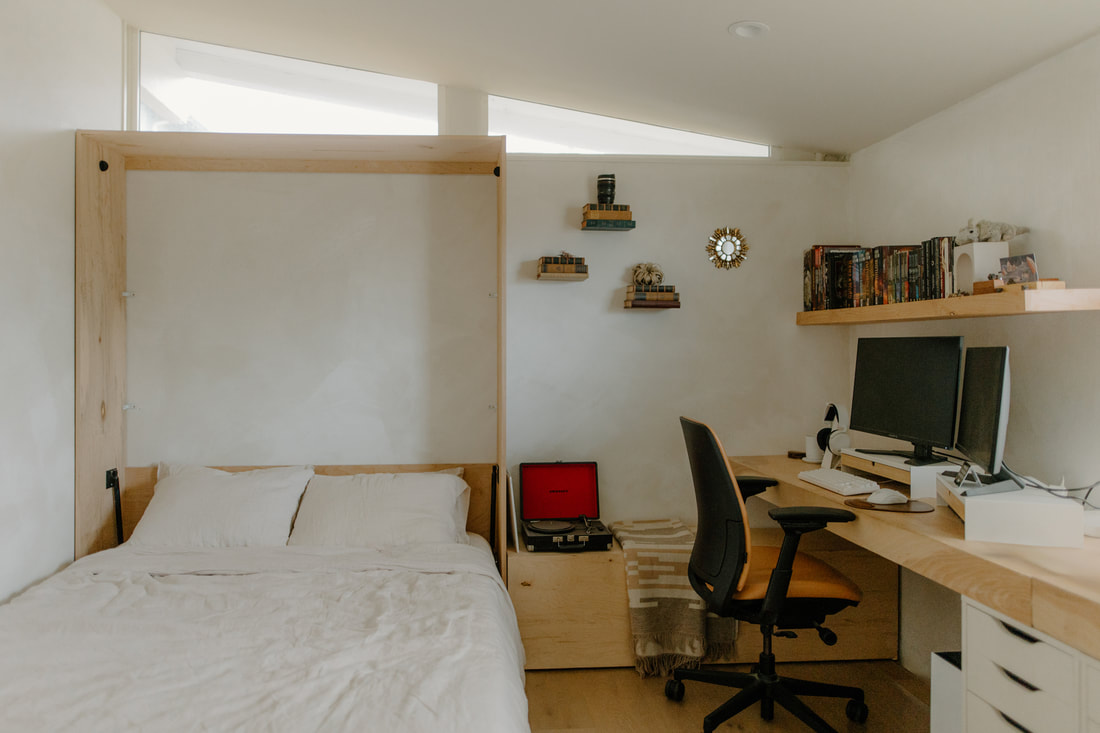
For the rare occasion that we have extra guests over, the murphy bed was a great solution. We made this out of a murphy bed kit, and custom made the front to match our closets. It was a time-consuming project, but well worth it. We added the bench after to make the bed and desk look cohesive and complete the space! GUEST BEDROOM
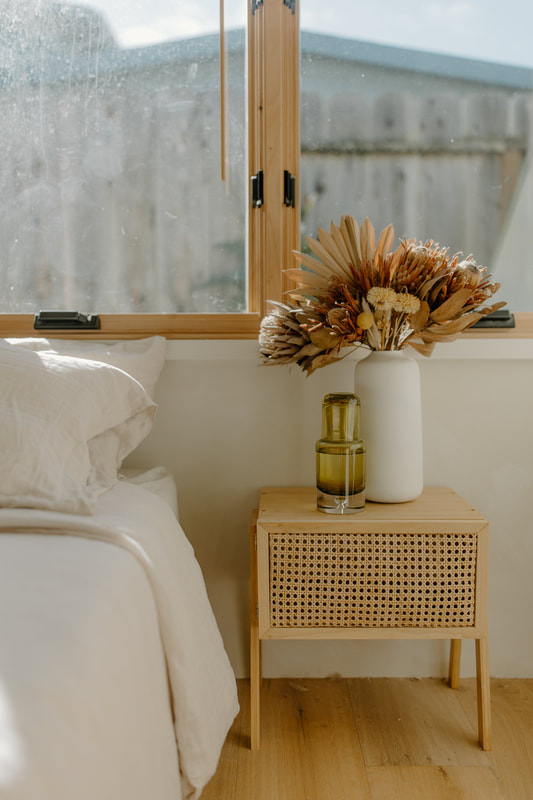
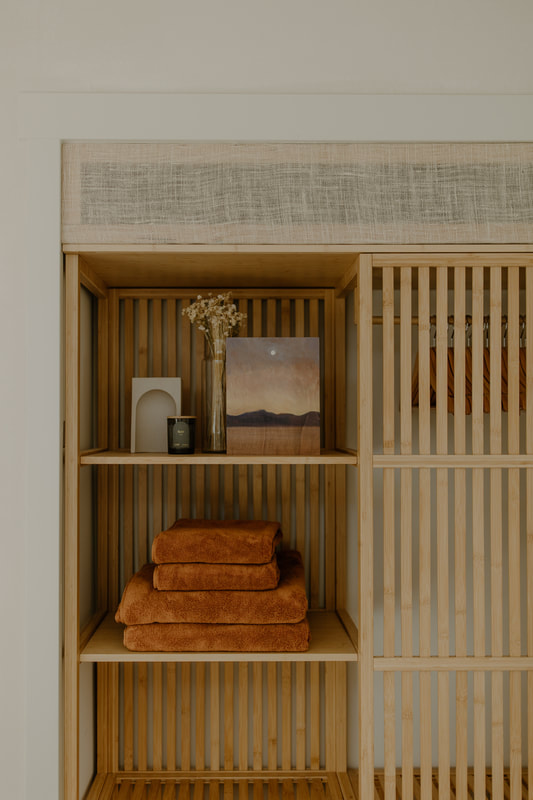
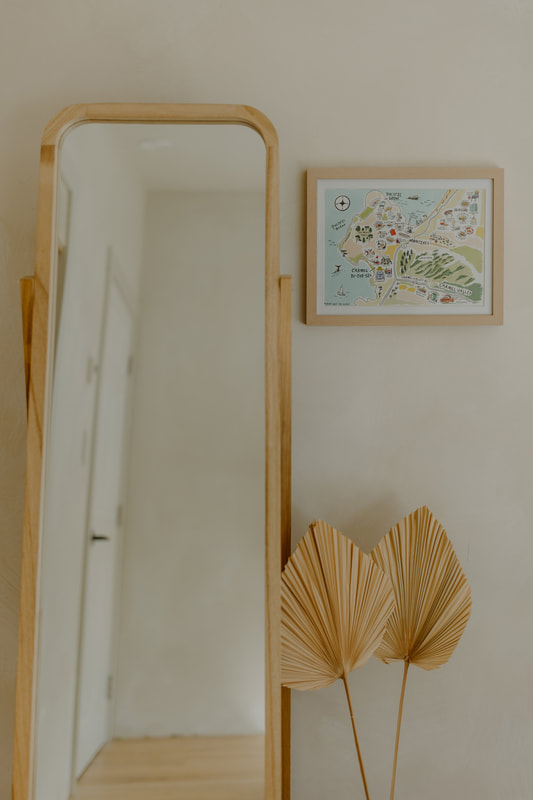
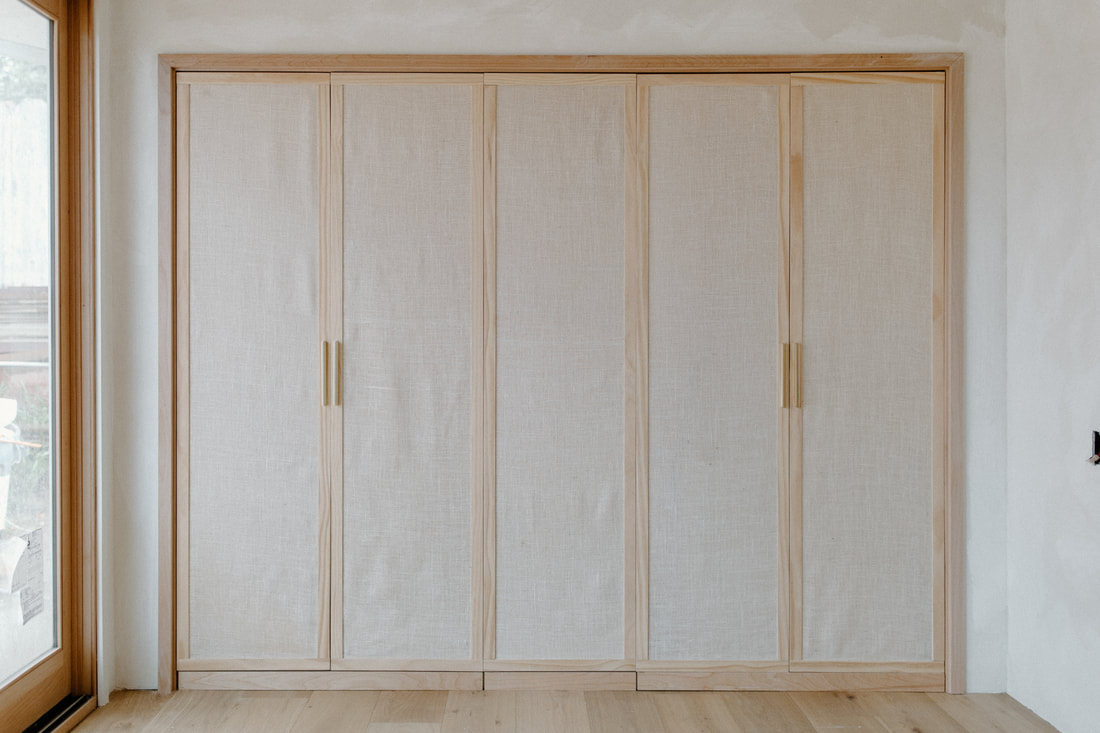
BED: Hashtag Home | BEDDING: Quince | NIGHTSTAND TABLES: DIY | WARDROBE: IKEA | CLOSET PANELS: DIY | BLINDS: Blinds.com | TOWELS: Brooklinen | FRAME: Target
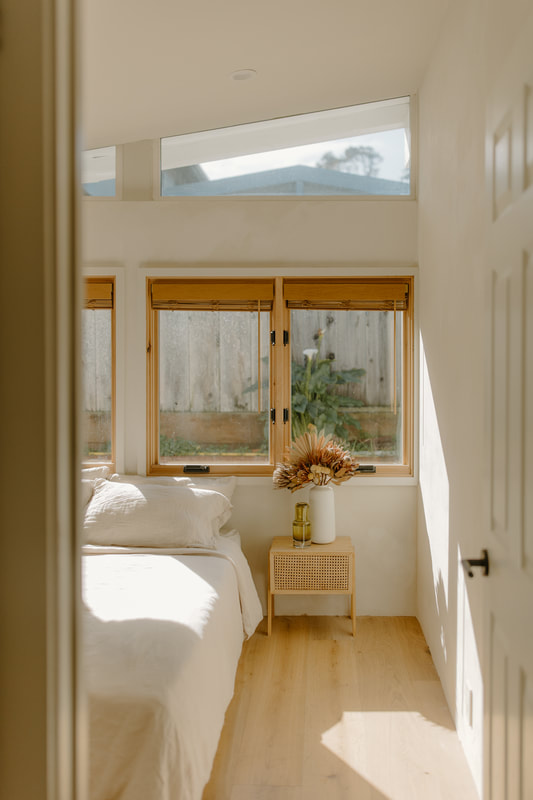
This room used to have a window on the side wall, but since that wall became part of the new bathroom, we knew we had to add natural light back in. Adding wood windows to the other wall made such a huge difference and added so much warmth. One problem we didn't think about though was needing to add curtains or blinds. Since we didn't want to cover the wood windows, we decided to get wood colored blinds. These were inside mounted for a minimalist look, so we ended up not being able to use the screens we had purchased since the blinds covered where the screens would have sat.
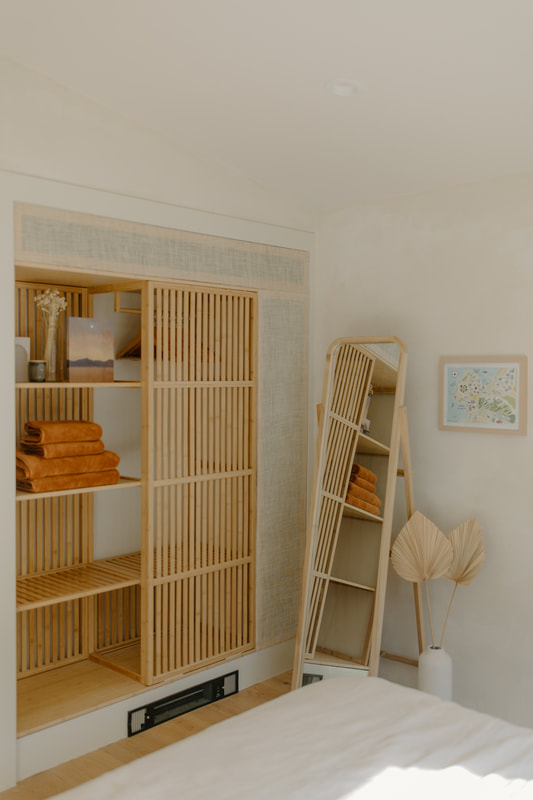
For the closet, we fell in love with the IKEA Nordkisa open wardrobe. It reminded us so much of our time in Japan with the open slats and shelves. To make it feel more built-in, we custom built panels out of MDF to cover the sides and back, and then filled the extra space with burlap covered frames. The nightstands were a previous DIY project that used to be in our primary bedroom, but now they fit this space so much better! GUEST BATHROOM
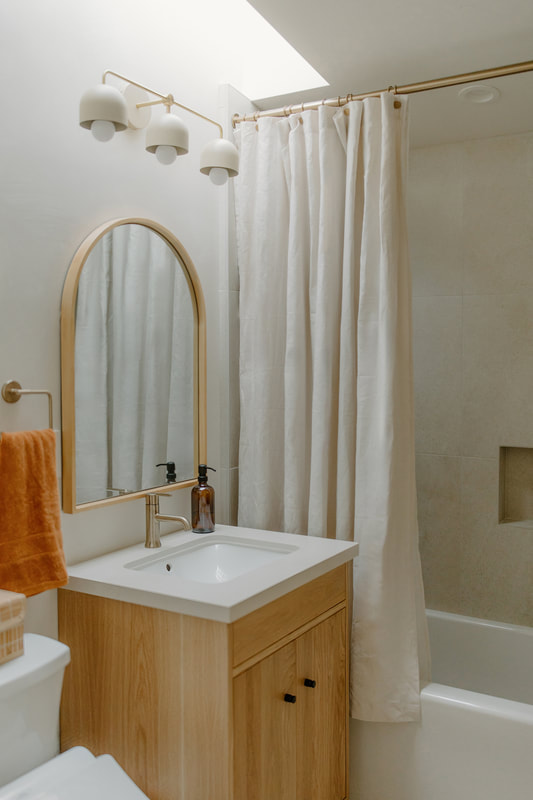
BATHTUB SURROUND AND FLOOR TILE: TileBar | BATHTUB: American Standard | VANITY: Room&Board | LIGHTING: Peared Creation | MIRROR: Kate and Laurel | FIXTURES: Delta Faucet, Moen | SHOWER CURTAIN: Quince | CURTAIN RINGS: Amazon | CURTAIN ROD: Amazon | BOTTLES: Amazon
This bathroom was definitely the least appealing room in the entire house when we moved in. While it had been updated, many of the updates were what you call a contractor's special - or poorly made to sell. It had an old door that was pink on one side and white on the other, a doorframe that was cut halfway up, an old rusty doorknob, cracked grout, an uneven transition from the flooring to the tile just to name a few. One of the first things we did was finally change out the door. When removing the old door, we found out that it hadn't even been mounted in a frame - it had just been mounted into the door opening.
To keep costs low, we kept the layout of the bathroom exactly as is. Though we would've loved to make this bathroom bigger, it wasn't in our budget. We knew we would have to re-do the tile because the window was removed, so it became a great opportunity to replace the tub as well. This was the only room we entirely demo-ed ourselves (besides the leftover tile from the other rooms when flooring was being done). Though we had hoped to keep the drywall, we realized it would be better long term if we started fresh. So we opened up the walls, updated the plumbing and electrical (the perfect chance to add an outlet for a bidet!), and had a skylight installed. Despite not having any windows, the skylight made such a huge difference - we're constantly thinking that we forgot to turn the light off! With updated fixtures, it transformed the room entirely and was the last room to finally match the rest of the house. Tools
Besides the usual tools you might need for DIY projects (drill, various saws, wood glue, etc.), here are some tools that we found very useful!
Conclusions
Phew! That was a lot, wasn't it? And that honestly doesn't even begin to cover the countless decisions and setbacks we ran into, or the hours spent researching and choosing materials. So if you're thinking of doing a remodel, here's our tips for you:
That concludes our house remodel blog post! Feel free to leave any questions in the comments below!
0 Comments
Your comment will be posted after it is approved.
Leave a Reply. |